Cryptography and Your Apps
 Federico Zanetello
 laurent b
Description: System frameworks encrypt both data at rest and data in transit in a transparent way for you. This functionality is available by simply setting an attribute. However you may want to do more to protect your users’ data. CryptoKit is a new Swift framework that makes it easier and safer than ever to perform cryptographic operations, whether you simply need to compute a hash or are implementing a more advanced authentication protocol.
Intro
Foundation of Apple Security and Privacy Features
Security and privacy are core values at Apple. We built it in all of the features that we work on, and cryptography is a big part of it.
For example, with device integrity we use cryptography to validate the integrity of the software running on the platform to make sure it has not been tampered with and guarantee its security properties are not changed.
We use cryptography across a wide variety of applications users love, use extensively for capturing very personal moments and sharing them. This is a case of Messages, Safari, and iCloud.
Cryptography is a tool.
- Authentication, knowing who sent you a message.
- Encryption, knowing that that message can be only be decrypted by you.
- Integrity, knowing that no one else could have modified the content of that message before it got to you.
- Compose primitives into protocols
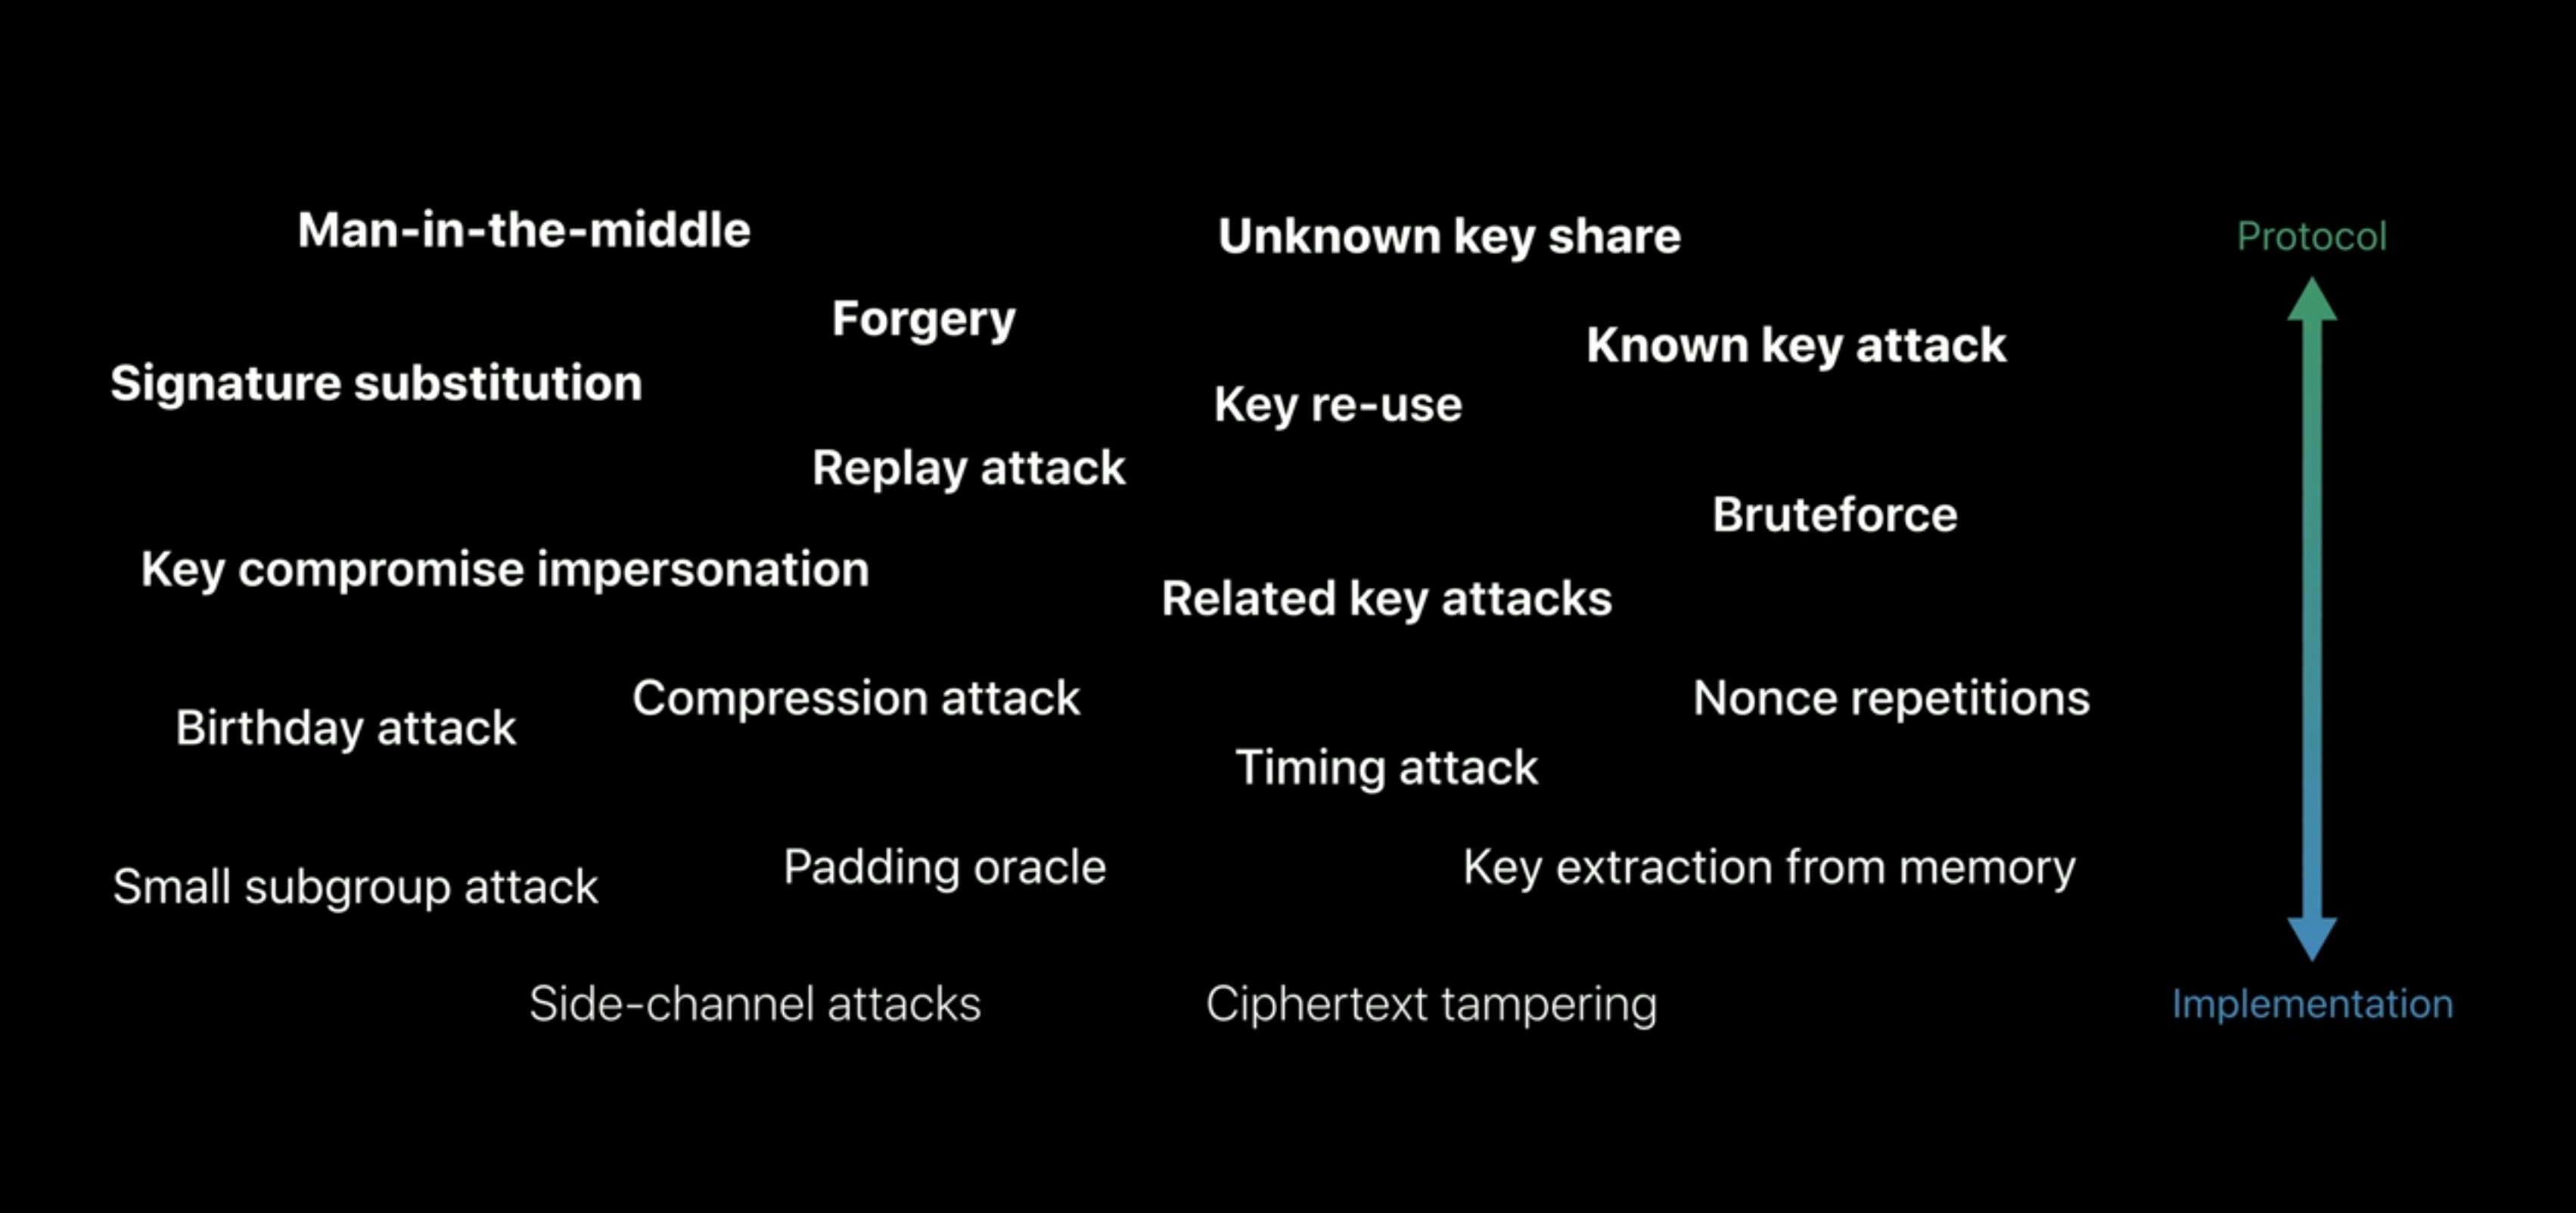
Cryptography Is Hard to Get Right
System Features
Common Cases Covered in this talk: - Protect data on device - Protect credentials and keys - Share data across devices and users - Secure network connections - Verify remote parties
Protect data on device
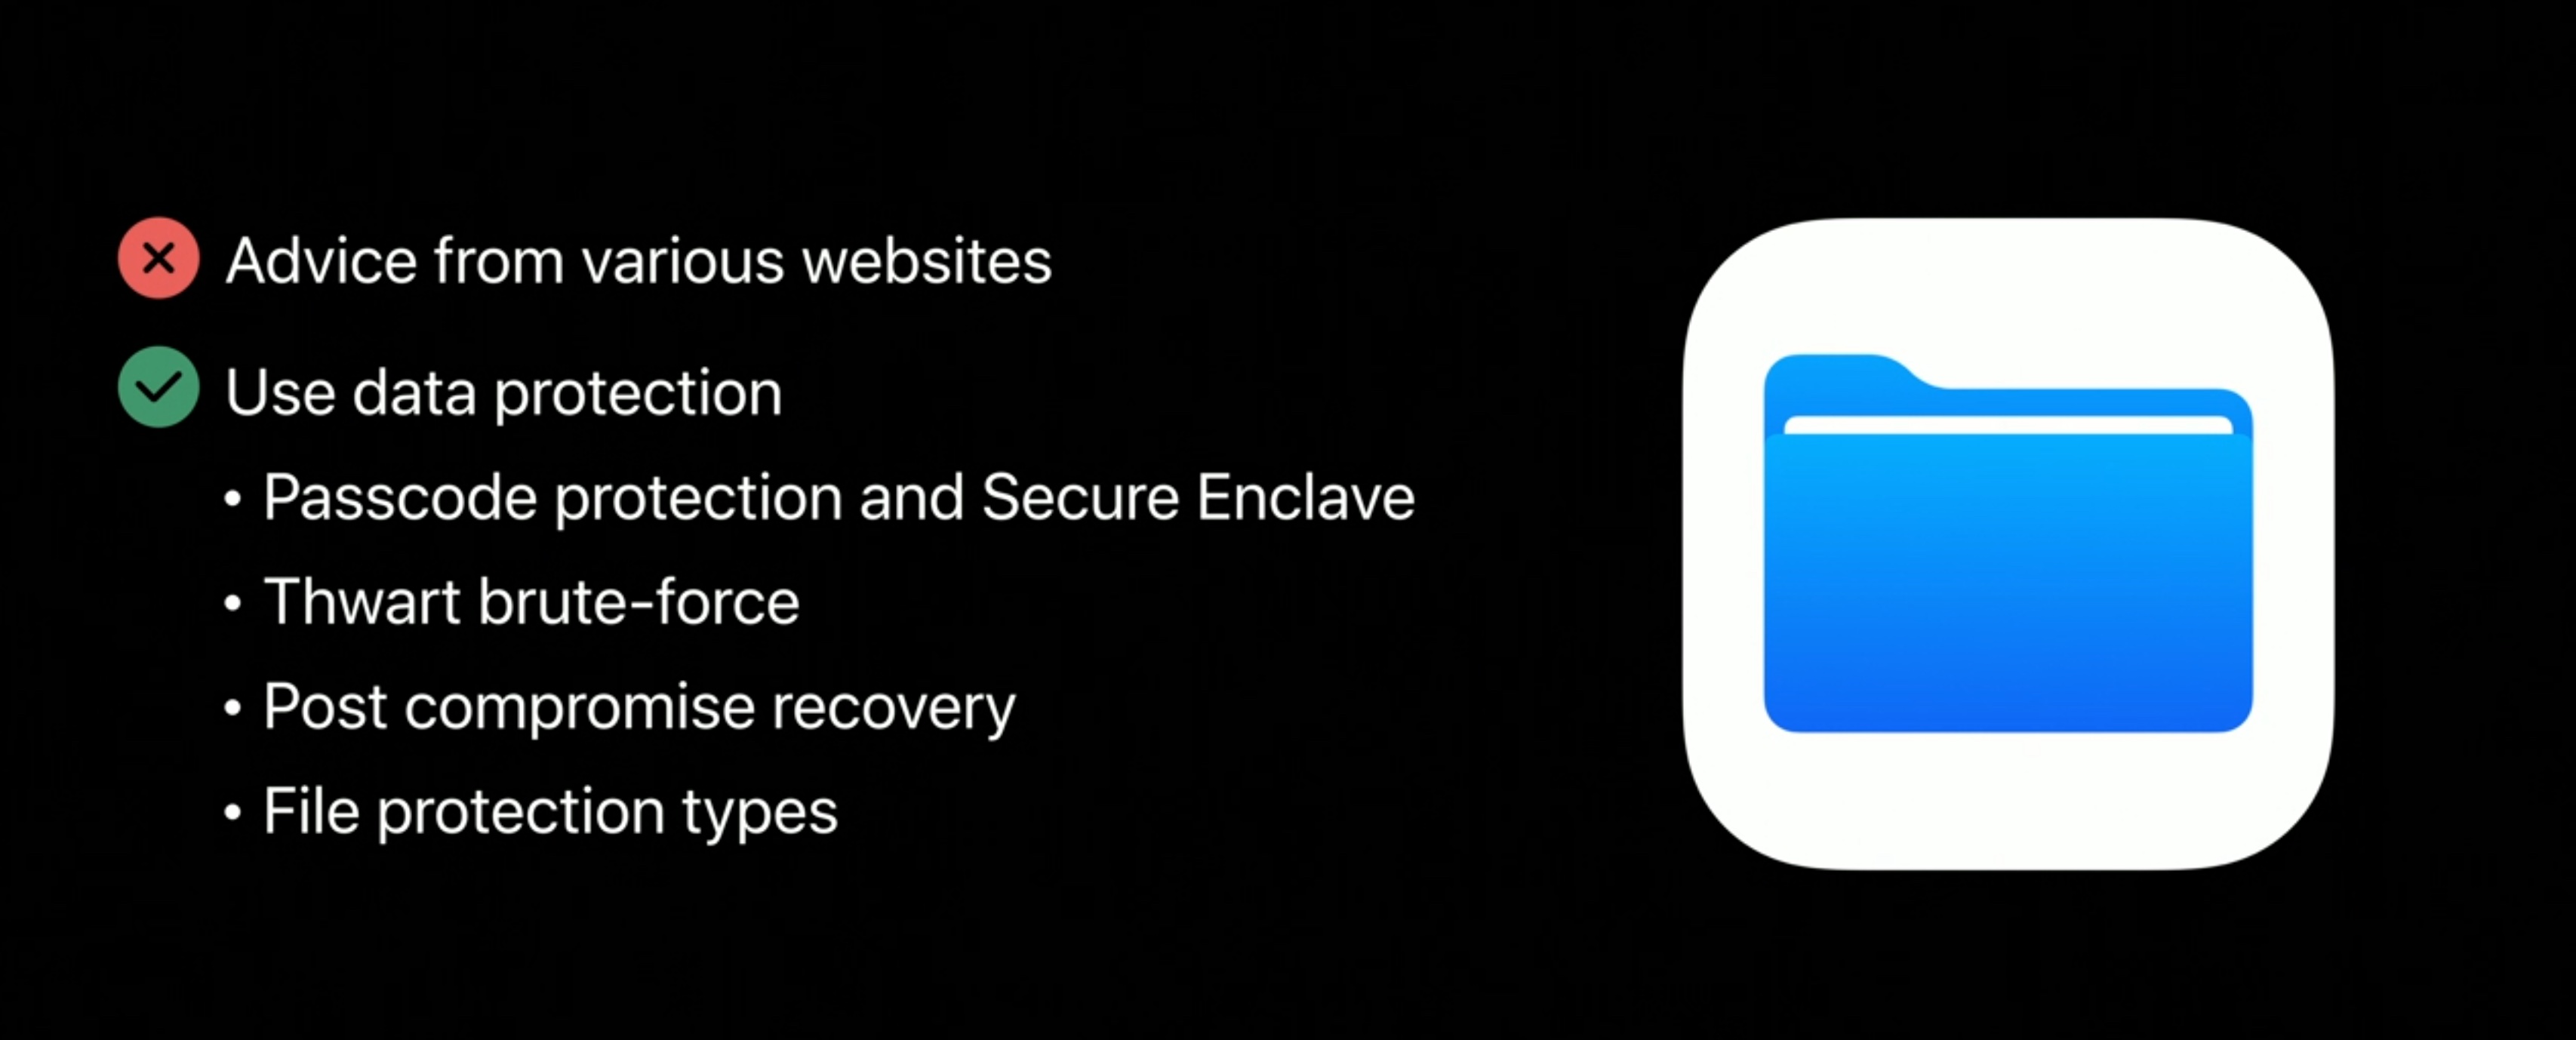
Data protection combines the strengths of the passcode with the hardware technologies in the Secure Enclave to make sure the keys are well secured, and the encrypted data cannot be used to brute-force the passcode. Data protection provides post compromise recovery. Post compromise recovery, also known as forward secrecy, guarantees that if adversary gets his hand on the keys on the device and the users change the passcode, all the data encrypted after that cannot be recovered from those old keys.
You can look at the iOS security white paper to get more information:
There is the complete file protection. Complete file protection means the data is only available after the user unlocks his phone. As soon as the user locks his phone back, put it back in the pocket or in a bag, the data is secure again. Here's an example.
Make files available only when device is unlocked:
// Write file, available only when device is unlocked
do {
  try data.write(to: fileURL, options: .completeFileProtection)
}
catch {
  // Handle errors
}
Protect Credentials and Keys
There may be more sensitive information that you may want to protect. There could be credentials like authentication tokens used to authenticate on services or cryptography keys. Please don't write them in defaults that you could see on all the platforms.
Instead, there is Keychain.

Keychain in the Secitem APIs allows you to write those items as in the local Keychain, which means they stay on that one device or on iCloud Keychain where they synchronize across all of the devices for a seamless experience in the user account. This requires user accounts with two-factor authentication enabled. For Keychain, you find very similar protection as for the files that I mentioned before and a few extra ones. In addition to when a key is cryptographically available, sometimes important for you to know how the user authenticated it and when. This is why we have LocalAuthentication. LocalAuthentication allows you to put restrictions as to when an operation can be executed. For example, you could define that it is required for the user to authenticate with biometrics with Face ID.
New LocalAuthentication Policies
- On macOS
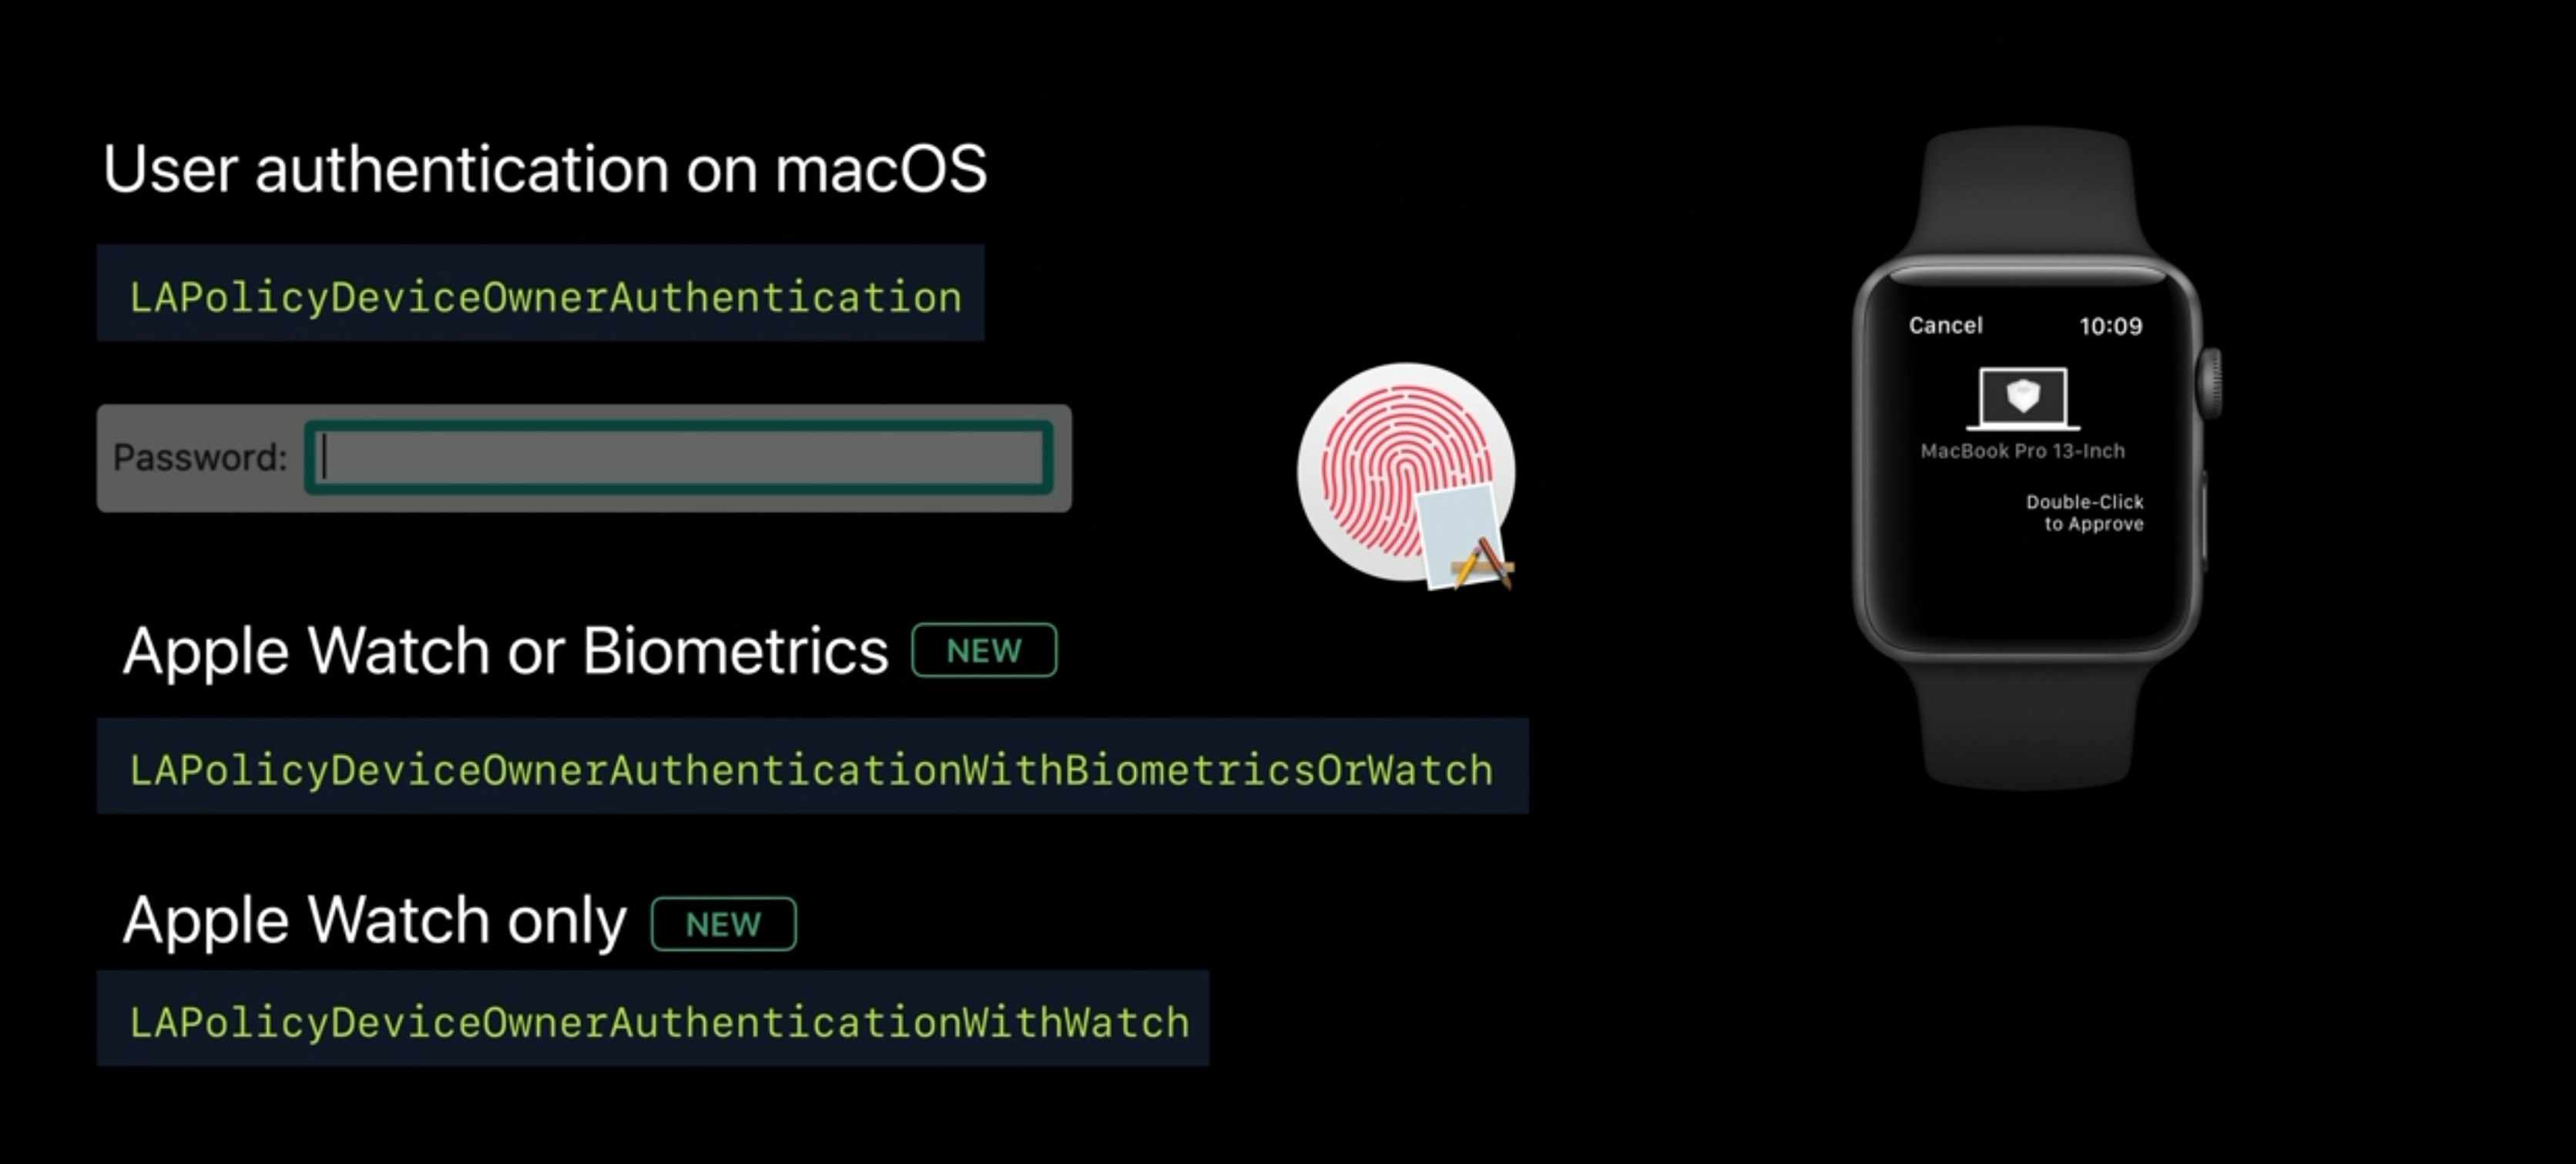
On macOS, you're used to device authentication properties, and it gives two way for the user to authenticate, the password or biometrics for Macs which support biometrics with Touch ID. The user can authenticate with Apple Watch and a double-click on Apple Watch. It's a great new experience, which is going to reduce the use of the password and reduce the friction, improves user experience. Now, with these new capabilities we added two new policies:LAPolicyDeviceOwnerAuthenticationWithBiometricsOrWatch
To reduce the authentication to biometrics only and Watch.
And:LAPolicyDeviceOwnerAuthenticationwithwatch
for the Watch alone.
Use LocalAuthentication: LocalAuthentication allows you to put restrictions as to when an operation can be executed. For example, you could define that it is required for the user to authenticate with biometrics with Face ID.
Store credentials and keys in the Keychain (SecItem).
Share Data Across Devices and Users
There is an easy way to synchronize items across all of the devices of an account. What if you have data? Well, for data we have a great solution too. CloudKit! Use a Private CloudKit Database to share data across devices and users: Encrypt assets in Private CloudKit Database:
- No need for application user sign in
- Apple as a trusted party
- iCloud identities and access control
Here is an example:
// Save the contents of a given fileURL to a per-user location
let asset = CKAsset(fileURL: ...)
let record: CKRecord = ...
record["AssetField"] = asset
let database = CKContainer.default().privateCloudDatabase
database.save(record){ ... }
Secure Network Connection
What when you want it done on data from your own server for example. Where for that you want to establish a secure connection.
Transport Layer Security.
Use Network framework with default TLS URLSession with App Transport Security. Our implementation of TLS also use TLS 1.3 by default.
A couple of examples:
// With Network Framework
let conn = NWConnection(host: "imap.mail.me.com", port: .imaps, using: .tls)
conn.start(queue: main)

// With URLSession
let url = URL(string: "https://www.apple.com")!
let task = URLSession.shared.dataTask(with: url) { (data, response, error) in
	if let error = error {
		// Handle error
	}
	// Operation on data
}
task.resume ()
With Network Framework, when you establish a connection, the only thing you need to do is using : .tls providing great security and performance.
For URL Session, the only thing here, it's the https endpoint, and this is it.
Verify Remote Parties
In some situation, you may not have the possibility to use TLS. For example, if you have trying to secure data through a content delivery network, for example. In this case, you manage those certificates. We have SecTrust for that.
Verify Remote Parties with SecTrust (SecTrustEvaluateAsyncWithError).
SecTrust provides you an easy way to validate the certificate against a trust policy. The trust policy may contain information about expiration, revocation, and until certificate has been validated, you know that you can use a key. Note that if using TLS you don't have a need to worry about certificate.
Now, in this release, we're happy to introduce a new function in SecTrust. This new function combines two things you were able to do before. On one hand, it's a function, which allows to asynchronously through an explicit action, do a certificate validation so that your application can do something else while the certificate is being validated.
But also this function gives you a richer handling. So, as a developer, you know what is going on in case of failure, and you can debug it.
// Evaluate a certificate validity asynchronously and with legible errors
SecTrustEvaluateAsyncWithError(trust, queue) { (trust, success, error) in
	if (success) {
		let publicKey = SecTrustCopyPublicKey(trust)
		// Use key...
	} else {
		// Handle errors
	}
}
Apple CryptoKit
Apple CryptoKit is new Swift cryptographic API which has been designed to follow the same philosophy as for those features we talked about and give you an easy access to cryptographic functions and hard to misuse functions.
Use this framework to perform cryptographic operations securely and efficiently.
There are four aspects: - CryptoKit and Swift. - The curated set of algorithms that is available in CryptoKit. - Secure Enclave and biometric authentication - Performance.
Apple CryptoKit and Swift
-We have a strongly typed API, and whenever you're initializing a value, we are verifying that the data you're passing is a strong value for that argument. - Thanks to Swift's memory management model, we're able to zeroize on release all of the secret values allocated within CryptoKit. - We perform equitable conformances for values like message authentication code if you're familiar with that content so that you're able to verify two-message authentication codes in constant time by just using the equals equals operator. - CryptoKit also defines protocols so that you can write generic code over a hash function H, and if in multiple places of your code base you have to pass different hash functions, you can write the code once and then parametrize the function call on a different hash function.
In the past, you might have had to write code that looks like this when you were calling into C crypto API from Swift.
You had to allocate buffers, figure out for each of the buffers what size it had to be, and there were values such as the nonce that you might have to search what the safe value for that value was.
And then you have all of these nested calls into the encryption function where you're passing pointers, and there are no argument labels that help you figure out which pointer needs to go into which argument.
// Encrypting with a C crypto API
let status = ciphertext.withUnsafeMutableBytes { (cipherPtr: UnsafeMutableRawBufferPointer) in
	tag.withUnsafeMutableBytes { (tagPtr: UnsafeMutableRawBufferPointer) in
		nonceData.withUnsafeBytes { (noncePtr: UnsafeRawBufferPointer) in
			key.withUnsafeBytes { (keyPtr: UnsafeRawBufferPointer) in
				plaintext.withUnsafeBytes { (plaintextPtr: UnsafeRawBufferPointer) in
					return encrypt(keyPtr, plaintextPtr, noncePtr, keyPtr, cipherPtr, tagPtr)
				}
			}
		}
	}
}
In contrast, with Apple CryptoKit, you can do exactly the same operation with a single line of code.
// Encrypting with Apple CryptoKit
let sealed = try AES.GCM.seal(dataToEncrypt, using: symmetricKey)
Something else you might have had to do is generating your own cryptographic key when you were calling into a C crypto API from Swift. And that involved first converting a number of bits and bytes because cryptographic keys are commonly expressed in bits.
// Generating and releasing a cryptographic key for a C Crypto API
let keyByteCount = 256/8
Then you have to allocate a buffer for that amount of bytes and use the system, random number generator to fill that buffer with cryptographically secure random numbers.
var key = Array(repeating: 0, count: keyByteCount)
let err = SecRandomCopyBytes(kSecRandomDefault, keyByteCount, &key)
Then, if an error occurred you had to handle that.
if (err != errSecSuccess) {
	// Safely handle the error
}
You're then finally ready to use that key, and when you're done with that key, you don't have to forget to zeroize it to remove it from memory.
// Zeroize the key
memset_s(&key, keyByteCount, 0, keyByteCount)
In contrast the CryptoKit, generating a key is just a single line of code. You call the SymmetricKey initializer, and you pass the number of bits you want the key to hold.
// Generating and releasing a cryptographic key with Apple CryptoKit
let key = SymmetricKey(size: .bits256)
We're able to zeroize this key on release for you because knowing about the auto reference counting of this value whenever it is getting deallocated, we're zeroizing that buffer for you.
Secure Algorithms
We have support for hash functions, message authentication codes, authenticated encryption, key agreement, and signatures. Some of these algorithms are algorithms we have supported before in frameworks such as Common Crypto or SecKey, but some of these algorithms are algorithms we're supporting for the first time. Those are highlighted in green on the slide.
Note that we also have an insecure module. This module provides algorithms such as MD5 and SHA1 so that you can adopt CryptoKit even if you need to be using some algorithms that no longer meet the best security standards.

Hash Functions
- Produces deterministic fixed-size digest
- Collision resistance
Hash functions produced deterministic fixed-size output that is called a digest, and unlike hashable in Swift, hash functions in CryptoKit provide cryptographic properties such as collision resistance. This means that it is hard to find two inputs that will hash to the same digest. In order to compute the hash, it is as easy as calling the hash method on the hash function you want to use, passing the data you want to hash.
Verifying the Integrity of a File
Here, I have some audio data I want to hash, and I use the SHA256 hash function to compute a digest.
let audioData = FileManager.default.contents(atPath: filePath)!
let digest = SHA256.hash(data: audioData)
Hashing Data Incrementally
If you're streaming a file, you might be reading it from an input stream. In that case, you want to compute the digest incrementally. You start by initializing a hasher by calling the MT initializer on the hash function. You then pass the data you want to hash, and you call the update method one or multiple times in order to do so. And when you want the digest to be computed, you just call the finalize method on the hash for instance, and that will return the digest.
var hasher = SHA256()
let fileStream = InputStream(fileAtPath: filePath)!
fileStream.open()
let bufferSize = 64000
let buffer = UnsafeMutablePointer<UInt8>.allocate(capacity: bufferSize)

while fileStream.hasBytesAvailable {
	let read = fileStream.read(buffer, maxLength: bufferSize)
	let bufferPointer = UnsafeRawBufferPointer(start: buffer, count: read) hasher.update(bufferPointer: bufferPointer)
}

let digest = hasher.finalize()
Authenticated Encryption
As its name suggests, it provides both authentication and encryption. The lack of authentication in cryptographic protocols can lead to a variety of attacks, and manually combining authentication with encryption can lead to things like padding oracle attacks. So, instead we're really happy to provide it to you as a single API call.
Example - Hiking app
I'm working on a side project. It's a hiking app.

Most of the content on the app is free, but there's additional content you can purchase through the in-app purchase. Once you purchase the content, you can retrieve the additional content. I'm using a content delivery network in order to keep the downloads fast, as my user base grows.
In order to obtain the content, I first check with my server if the in-app purchase is valid. Then, the key is retrieved from the server and passed on the phone. I download the encrypted data from the content delivery network, and I use the key in order to decrypt the encrypted content. And if the key is right, and the data wasn't tampered with on the content delivery network, I'm able to retrieve the map data.
Decrypting Content
Let's see how this translates to code. First, we start by initializing a SymmetricKey from the key data that was retrieved from the server.
// Initialize the decryption key
let key = SymmetricKey(data: keyData)
Then we are initializing a sealed box.
// Initialize the sealed box
guard let sealedBox = ChaChaPoly.SealedBox(combined: downloadedData) else { throw MapDownloaderError.invalidDownload
}
In this case, it doesn't really matter what's in the sealed box, but know that if you're working on implementing a specification that requires you to combine the nonce, the cipher text and the tag in a specific way, you can use the sealed box to do that. If you're implementing a protocol that requires you to pass specific nonce values we're also able to support that.
So, we're passing the downloaded data as a combined representation to the sealed box, and now that we have a box, we can simply open it by calling the open method on the cipher. And we're passing the key.
// Open the sealed box (authenticates + decrypts)
let mapData = try ChaChaPoly.open(sealedBox, using: key)
Signatures
- Authenticates data using a private key
- Verifies data using the associated public key
Signatures are used to authenticate data using a private key, and using the signature, we are able to verify data using the associated public key.
Let's take an example where we want to use the signature in order to authorize and operation. The operation here can be a two-factor log-in or some sensitive transaction such as wiring money to another user of the application. In order to do so, we start by generating a private key on the device.
We then retrieve the associated public key. The associated public key is registered with your service, and once we want to perform that operation, we're using the private key to generate the signature on the transaction data and then sending over the transaction data and the signature to the server.
The server will verify that the signature is correct, and if the signature is right, it will proceed to doing the operation.
Let's see what this code looks like. In order to generate a cryptographically strong private key, we call the PrivateKey initializer. Then we want to register some public key data on the server. We start by retrieving the public key by just calling public key on the private key, and then we want to say what representation we want to get from the public key.
// Generate private key and register public key with server
let privateKey = P256.Signing.PrivateKey()
let publicKeyData = privateKey.publicKey.compactRepresentation!
// Store privateKey in Keychain
Multiple representations of public keys exist, and we have support in CryptoKit for a lot of them. In this case, we're taking the compact representation.
As always, we're storing the private key in the Keychain.
In order to produce the signature, we are calling the signature method on the private key, and we're passing the transaction data we wish to sign, and this returns the signature.
// Signing content
let signature = try privateKey.signature(for: transactionData)
Now, this key that protects these operations is of high value, so we want to give it the best security it can.
Secure Enclave
The Secure Enclave is s hardware-based key manager that's isolated from the main processor to provide an extra layer of security.
It is used as part of critical system features, such as Touch ID or Face ID. In short, this is the T2 we have in the latest MacBooks. We can use the Secure Enclave for extra safety, this requires extra steps in when de/encrypting things.
Using the Secure Enclave
We start by checking if a Secure Enclave is available on the device.
We do so by calling isAvailable on SecureEnclave.
// Check that the device has a Secure Enclave
if !SecureEnclave.isAvailable {
// Handle devices without Secure Enclave
}
And from there, we can use exactly the same code as before in order to produce, to generate the key and produce the signature within the Secure Enclave. Note that in order to do so, we simply prefix or call to the PrivateKey initializer call that generates the key, and we prefix it with Secure Enclave dot.
// Generate private key and register public key with server
let privateKey = try SecureEnclave.P256.Signing.PrivateKey()
let publicKeyData = privateKey.publicKey.compactRepresentation!

// Store privateKey in Keychain
...

// Producing a signature
let signature = try privateKey.signature(for: transactionData)
Constraining Key Usage
An advantage of using the Secure Enclave is that you can constrain key usage. In this case, we want to say that the key that we're generating on the Secure Enclave is only accessible when the device is unlocked and that this key will be available on this device only.
let accessControl = SecAccessControlCreateWithFlags(nil, kSecAttrAccessibleWhenUnlockedThisDeviceOnly, [.privateKeyUsage, .userPresence], nil)!
let privateKey = try SecureEnclave.P256.Signing.PrivateKey(accessControl: accessControl)
We can further constrain key usage by saying that when we're performing an operation with the private key, we want to require user presence. Requiring user presence means that the user will either be prompted for biometric authentication or they will be requested for their device password. Now that we have composed an access control policy, we are simply passing it to the initializer of the key we're generating, and that policy will be enforced.
Customizing Authentication Context
You might want to give some additional context to your users about why they're required to authenticate. In order to do so, you can pass a LocalAuthentication context.
let accessControl = SecAccessControlCreateWithFlags(nil, kSecAttrAccessibleWhenUnlockedThisDeviceOnly, [.privateKeyUsage, .userPresence], nil)!

let authContext = LAContext()
authContext.touchIDAuthenticationAllowableReuseDuration = 10
authContext.localizedReason = "Authorizing $10 transfer to Bob."

let privateKey = try SecureEnclave.P256.Signing.PrivateKey(accessControl: accessControl authenticationContext: authContext)
In this case, we say that we want the LocalAuthentication context to be valid for ten seconds, so the user will not be required to reauthenticate during that amount of time, and we want to tell the user that they're required to authenticate because they're authorizing a $10 transfer to Bob. In order to use that authentication context, you simply pass it to the key's initializer.
Performance

CryptoKit is built on top of corecrypto. Corecrypto is Apple's native cryptographic library that features all of the system frameworks. With the help of the team that brought you the Accelerate framework and the CPU design team, corecrypto has hand-tuned assembly code, squeezing every cycle out of each of the support micro architectures. In addition to that, because it uses corecrypto, it takes advantage of security mitigations in corecrypto such as side-channel resistance, and because corecrypto is FIPS validated, that means that you can use CryptoKit in the FIPS compliant way. Link to the CryptoKit documentation:
Apple CryptoKit
and it comes with Xcode Playground:
Sample Code - Performing Common Cryptographic Operations
 GitHub
 zntfdr.dev
 Twitter