UIKit: Apps for Every Size and Shape
 Federico Zanetello
Description: Ground-up coverage of how to make an app that can fit on devices of every size and shape. Make your app fit beautifully on Apple's full range of devices with the minimum amount of effort, future-proofing your user experience along the way.
Safe Area and Layout Margins
- All non-iPhone X phones have a safe area that cover the whole screen, only iPhone X has a safe area that is smaller than the whole screen:
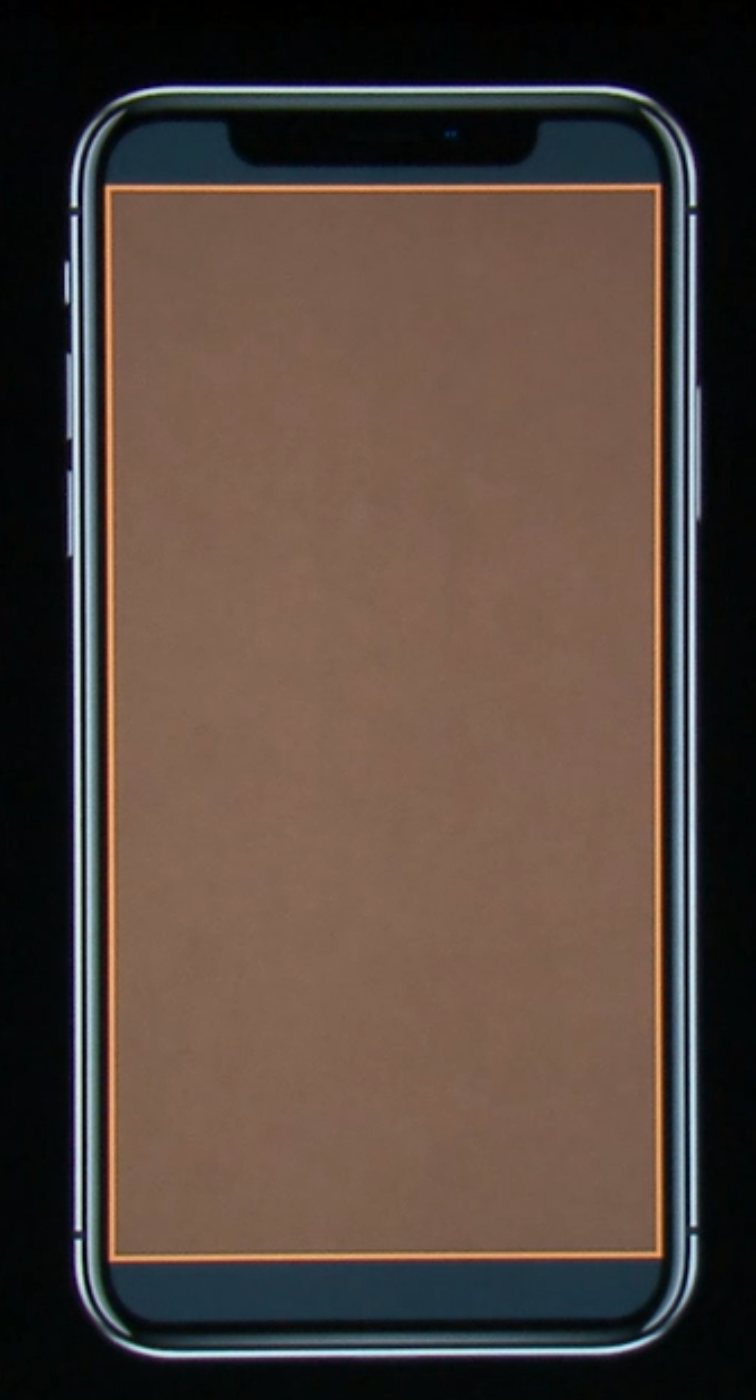 | 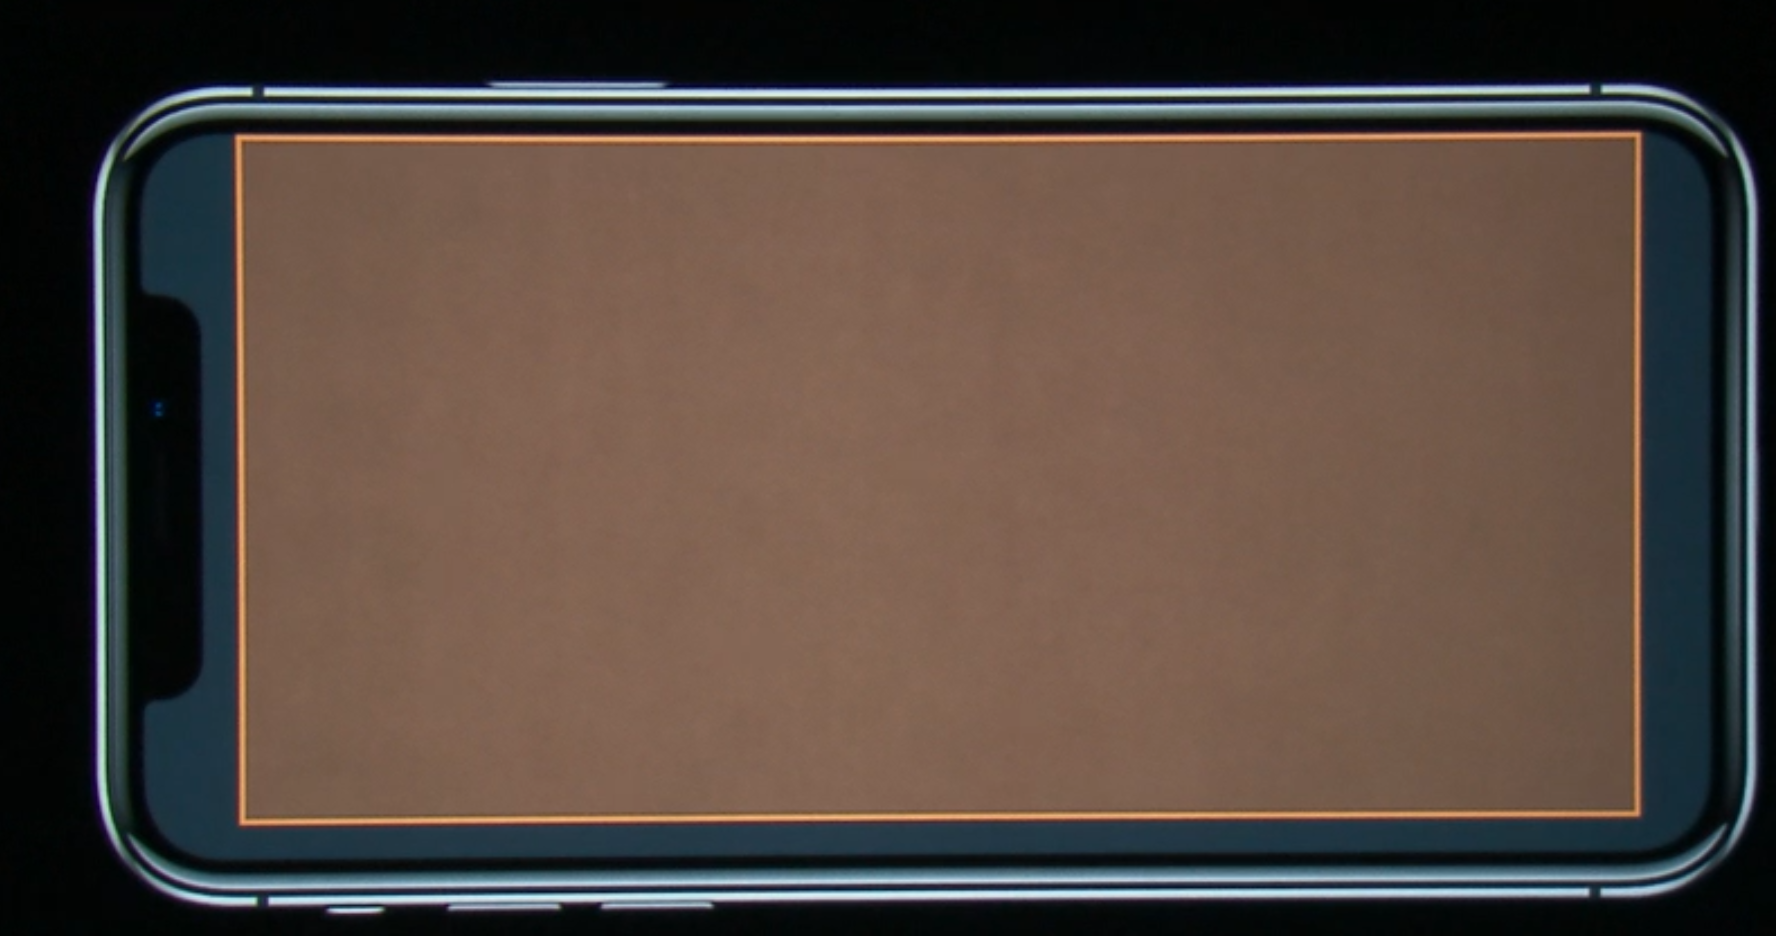 |
- This is to take care of the on-screen home indicator and the notch (on landscape the safe area is symmetric). But Tvs can also have the same thing where the safe area is smaller than the whole screen
- You can add your own Safe area insets (via a
UIViewController):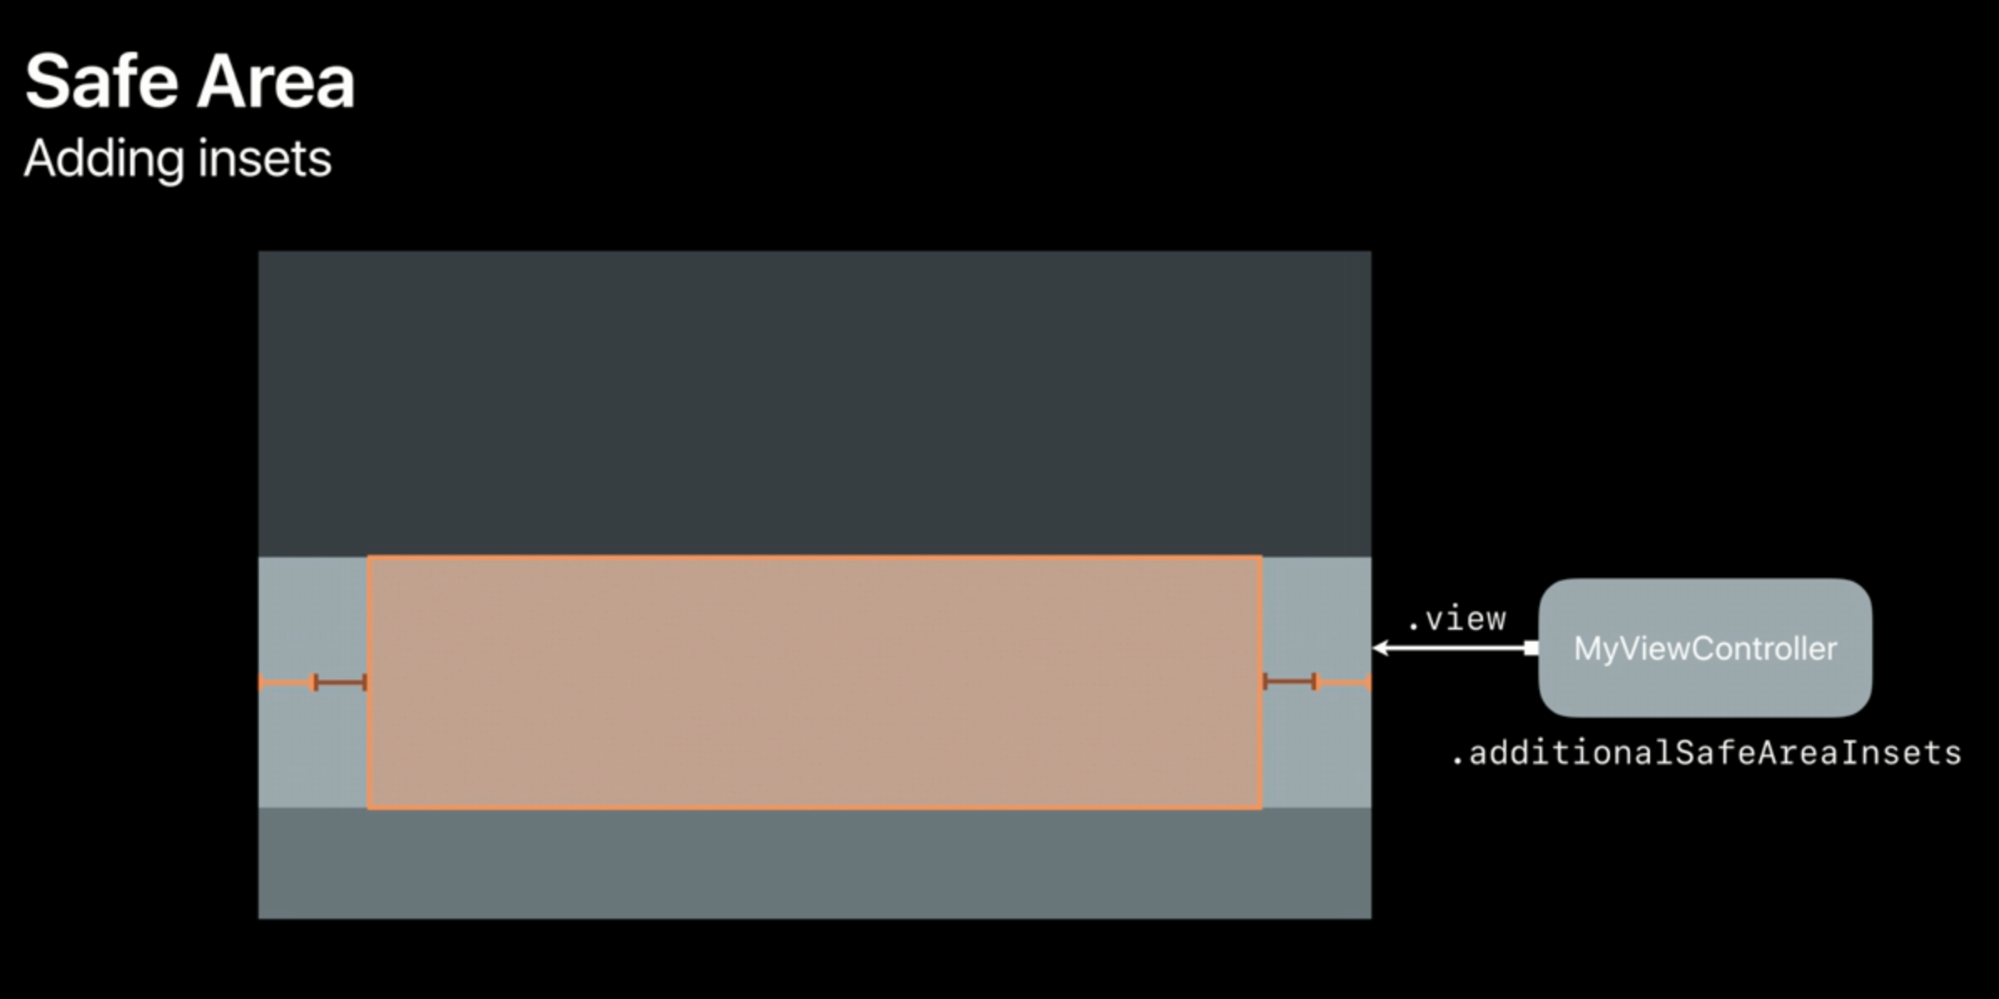
- Use
.directionalLayoutMarginsinstead of.layoutMargins: the difference is in the declaration: the former uses.left/.right, while the latter uses.leading/.trailing: thanks to this difference, the latter adapts automatically to right to left (RTL) languages, while the former doesn’t
ScrollViews
Fundamentals
- ScrollViews use contentOffset (
.xand.y) as a way to represent the current scroll position of the scroll view
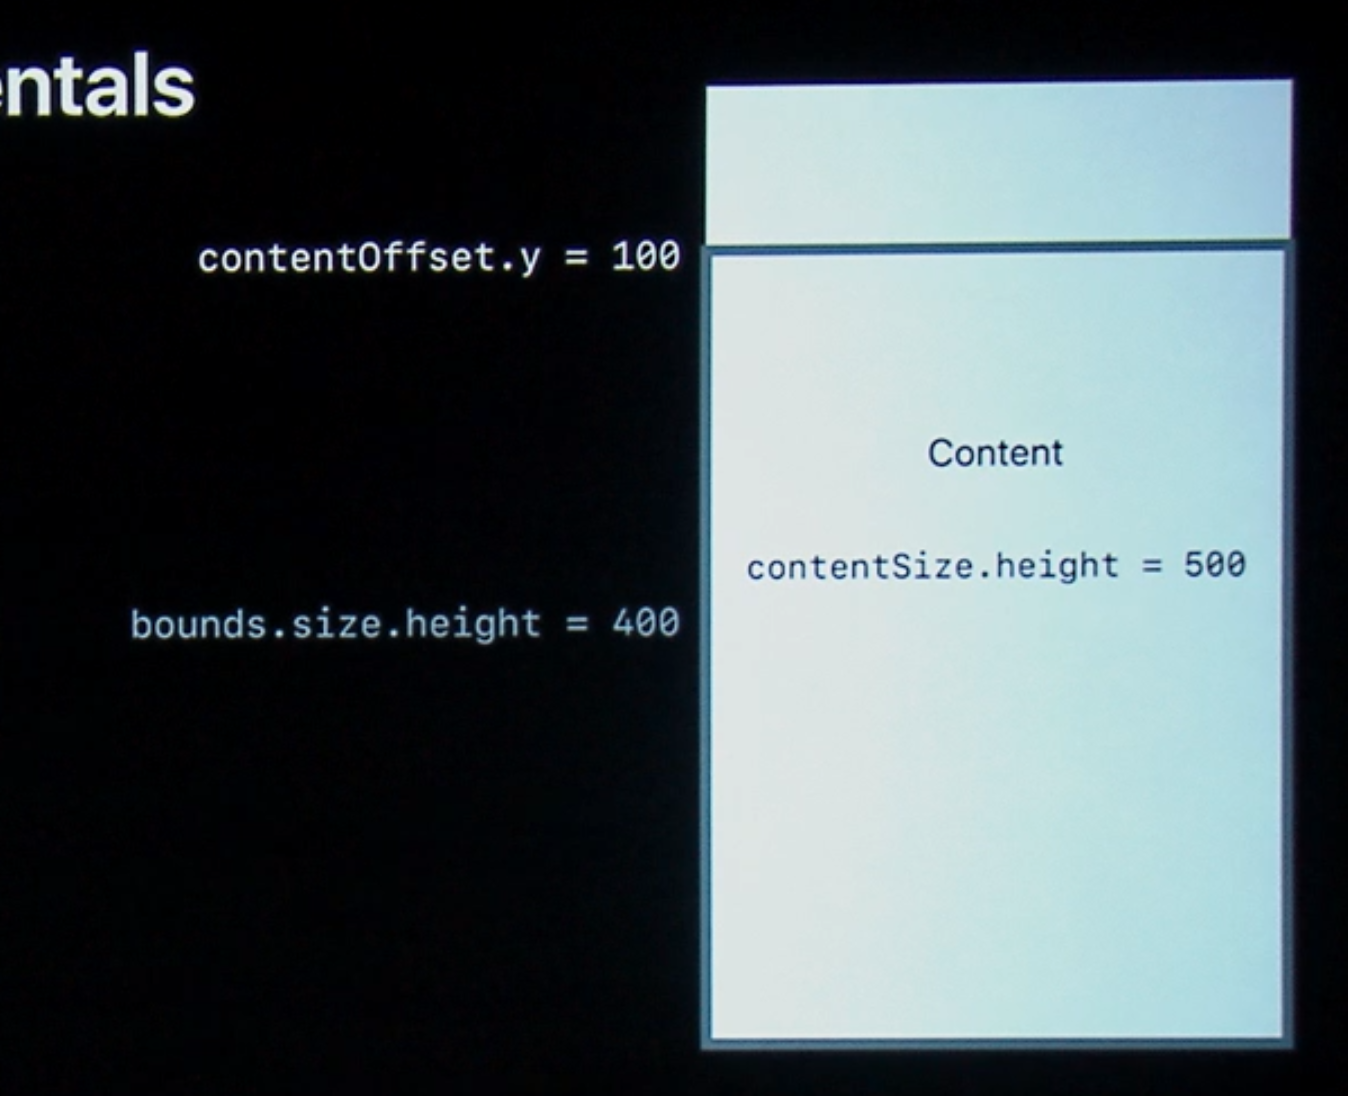 | 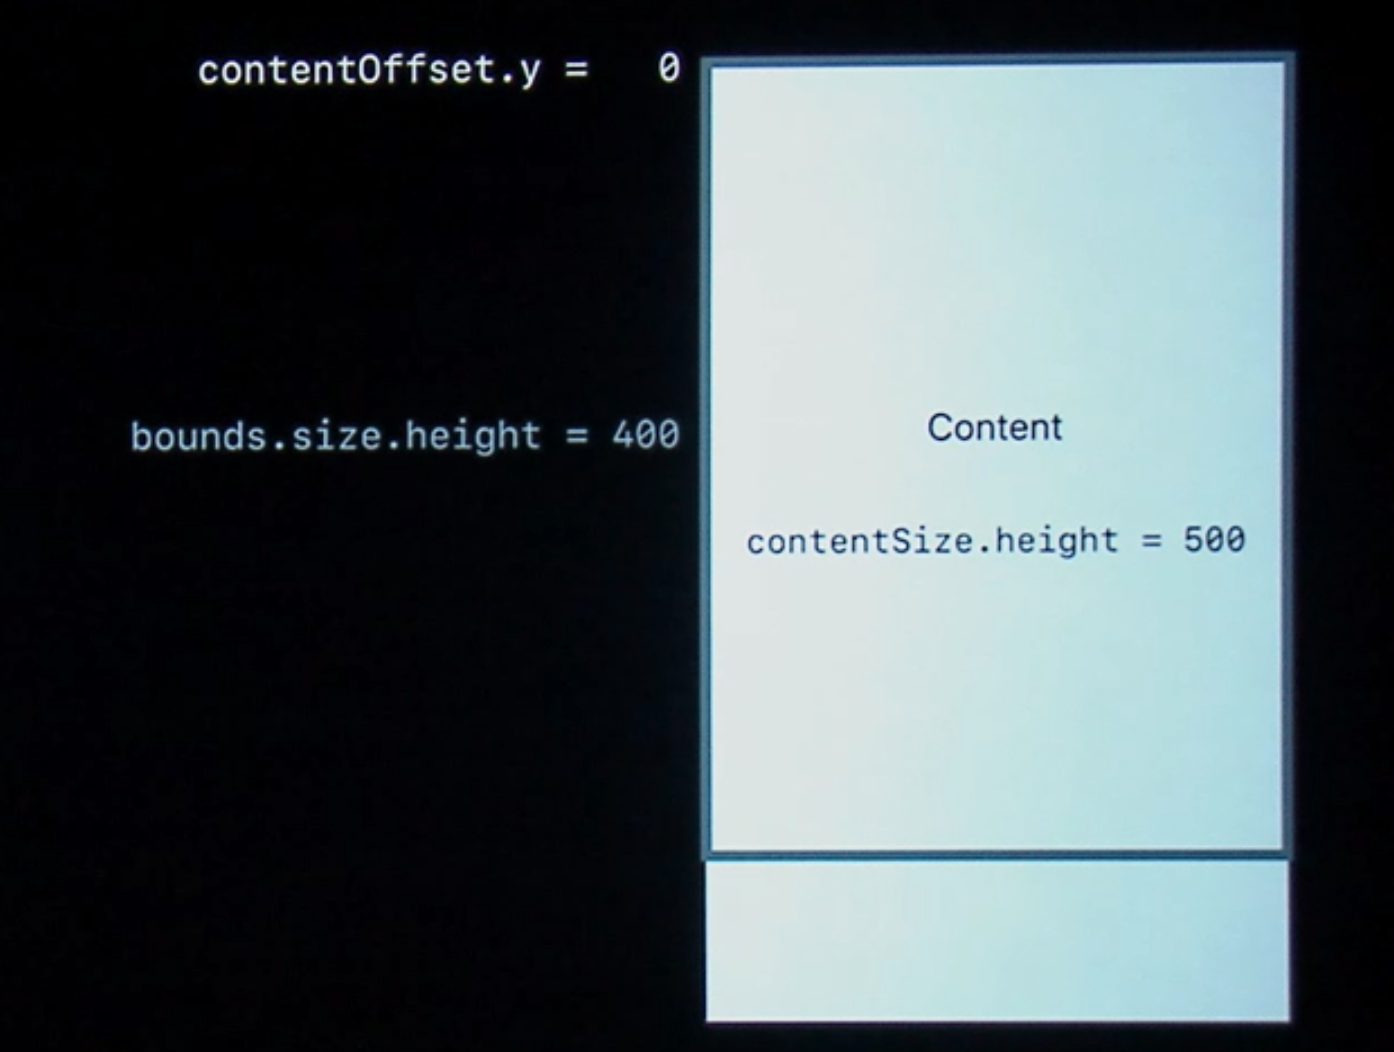 |
- How to extend the scrollable area of a scroll view?
.contentInsetsto the rescue! These are insets we can define ourselves that will go from the edges of the scrollable area to the content inset
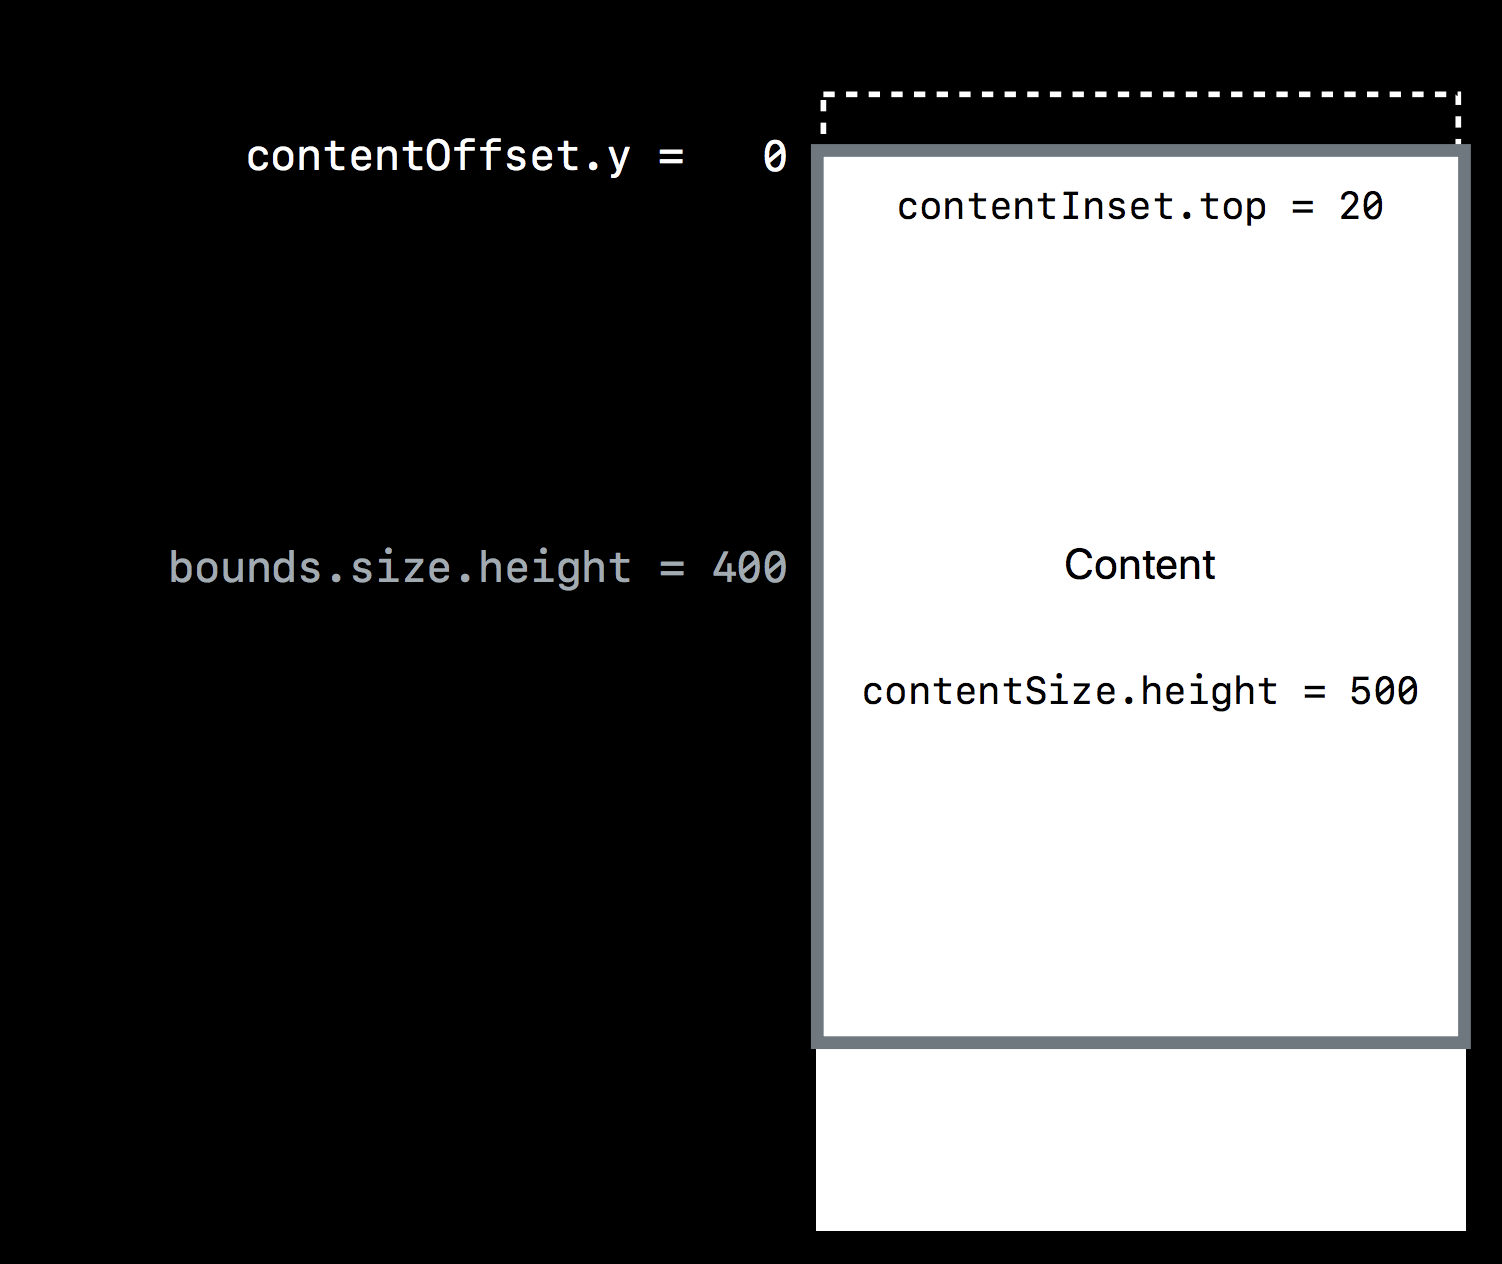 | 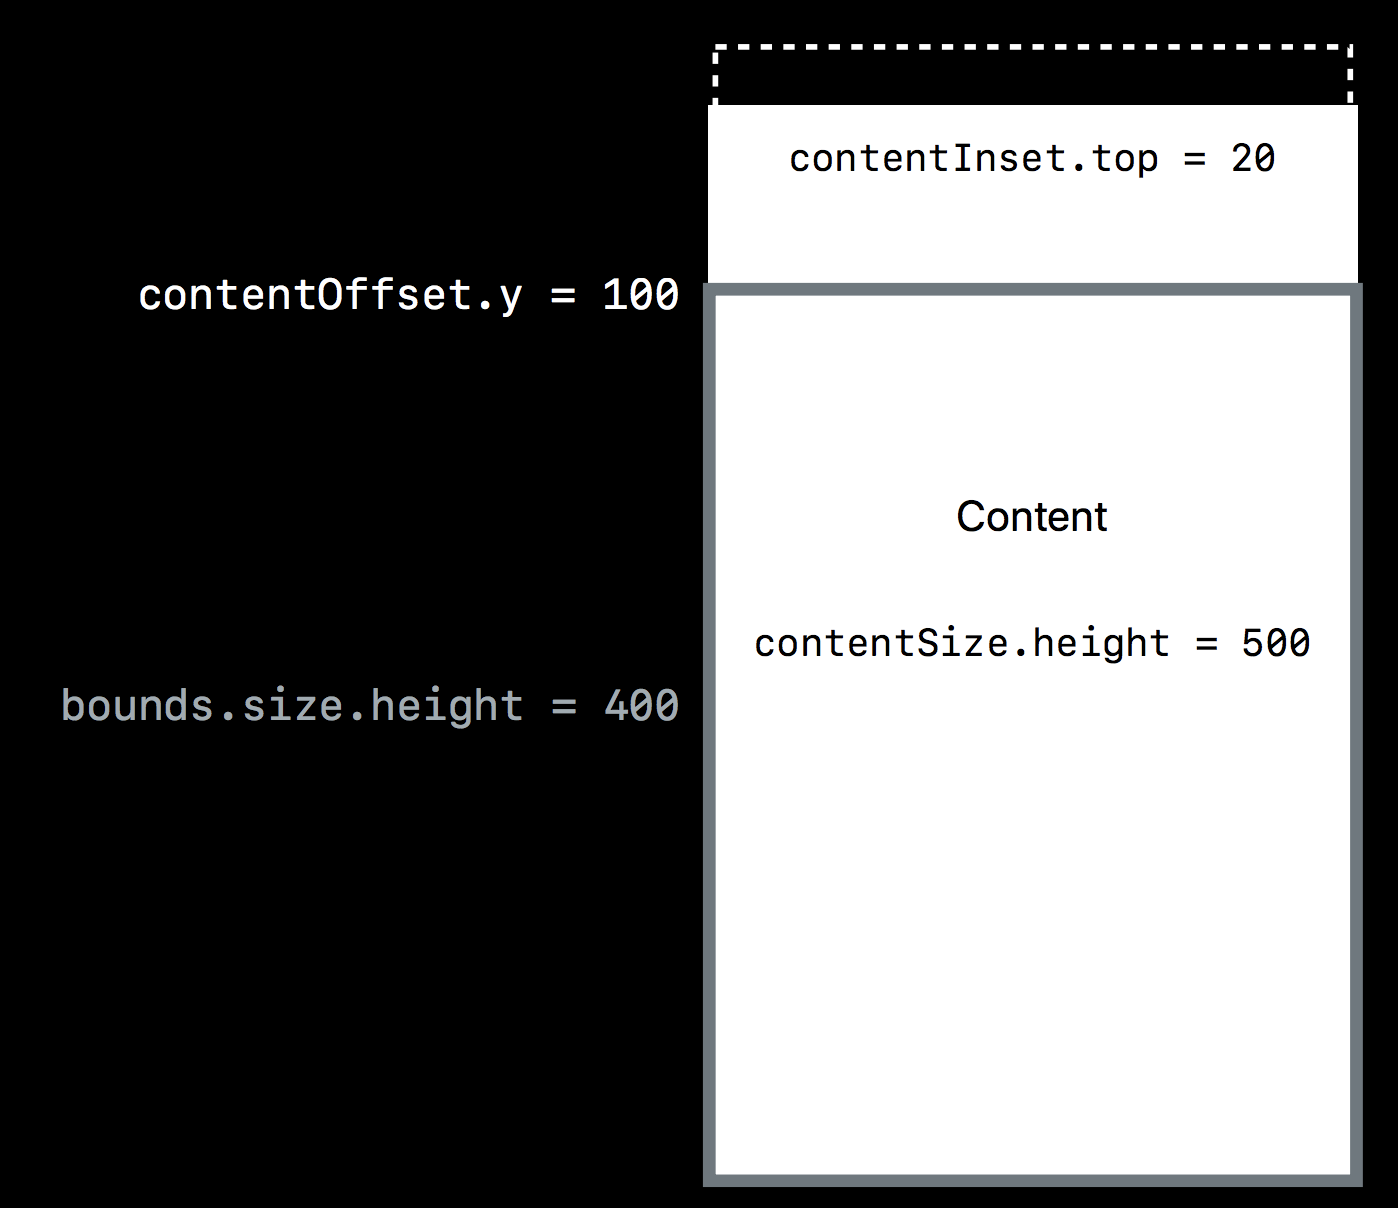 |
With contentInset.top = 20 the scrollable area is 20 points more, note how the contentOffset is not affected by the inset. | we can scroll until the offset is -20 |
- From iOS 11 every
UIScrollViewControllerhas a new (read only) property called.adjustedContentInset:
contentInsetis what we define,system insetis safe area and more, eg: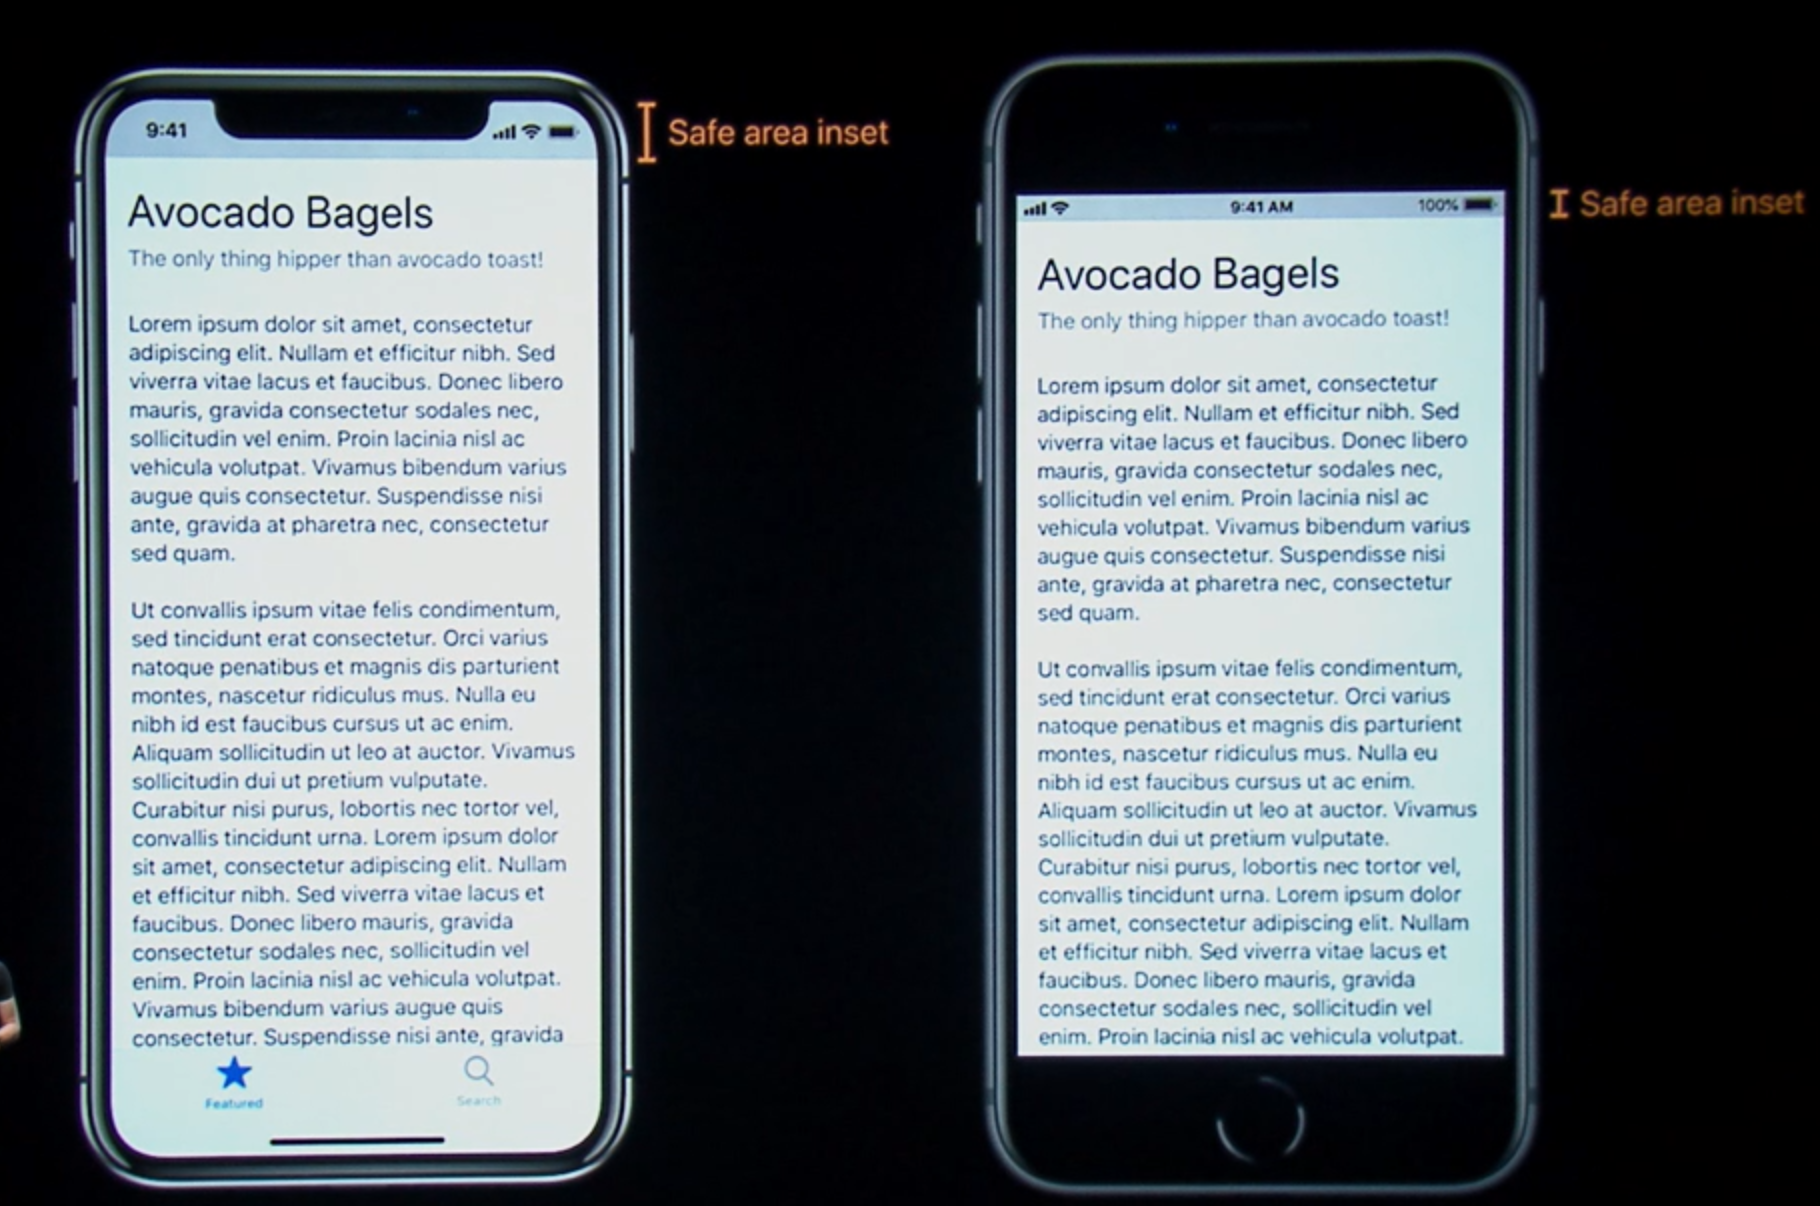
Building Adaptive Apps (put all together)
Let’s see an example:
This screen has a (1) content view (vertical scroll), embedded in a (2) navigation view, embedded in a (3) tab bar: 
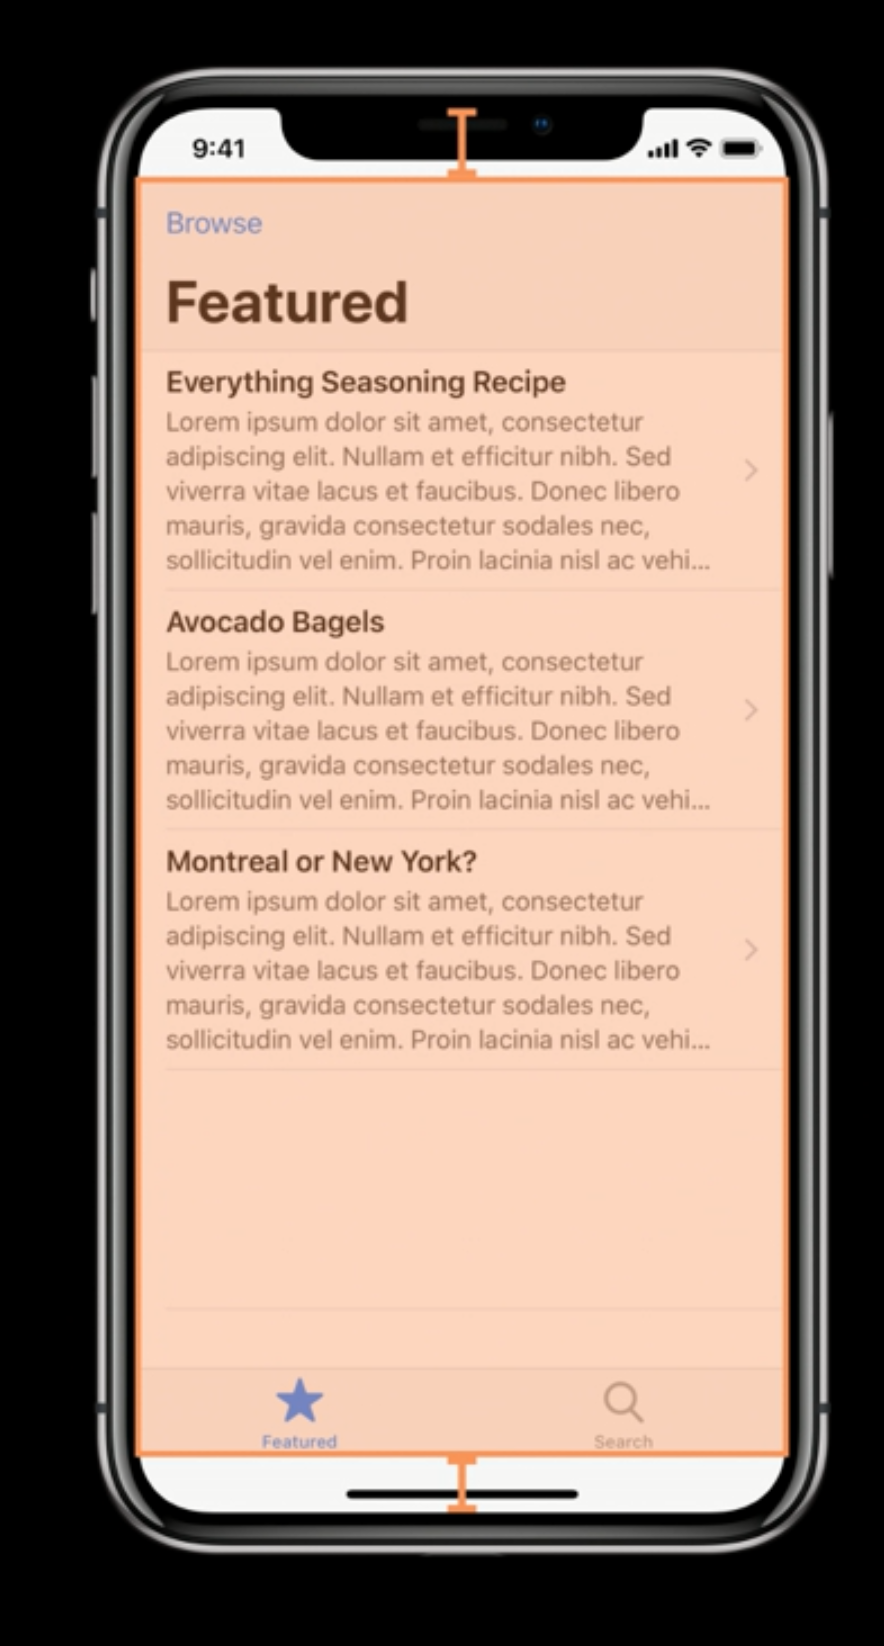
- The tab bar sees only the safe area insets of the screen (home indicator + status bar):
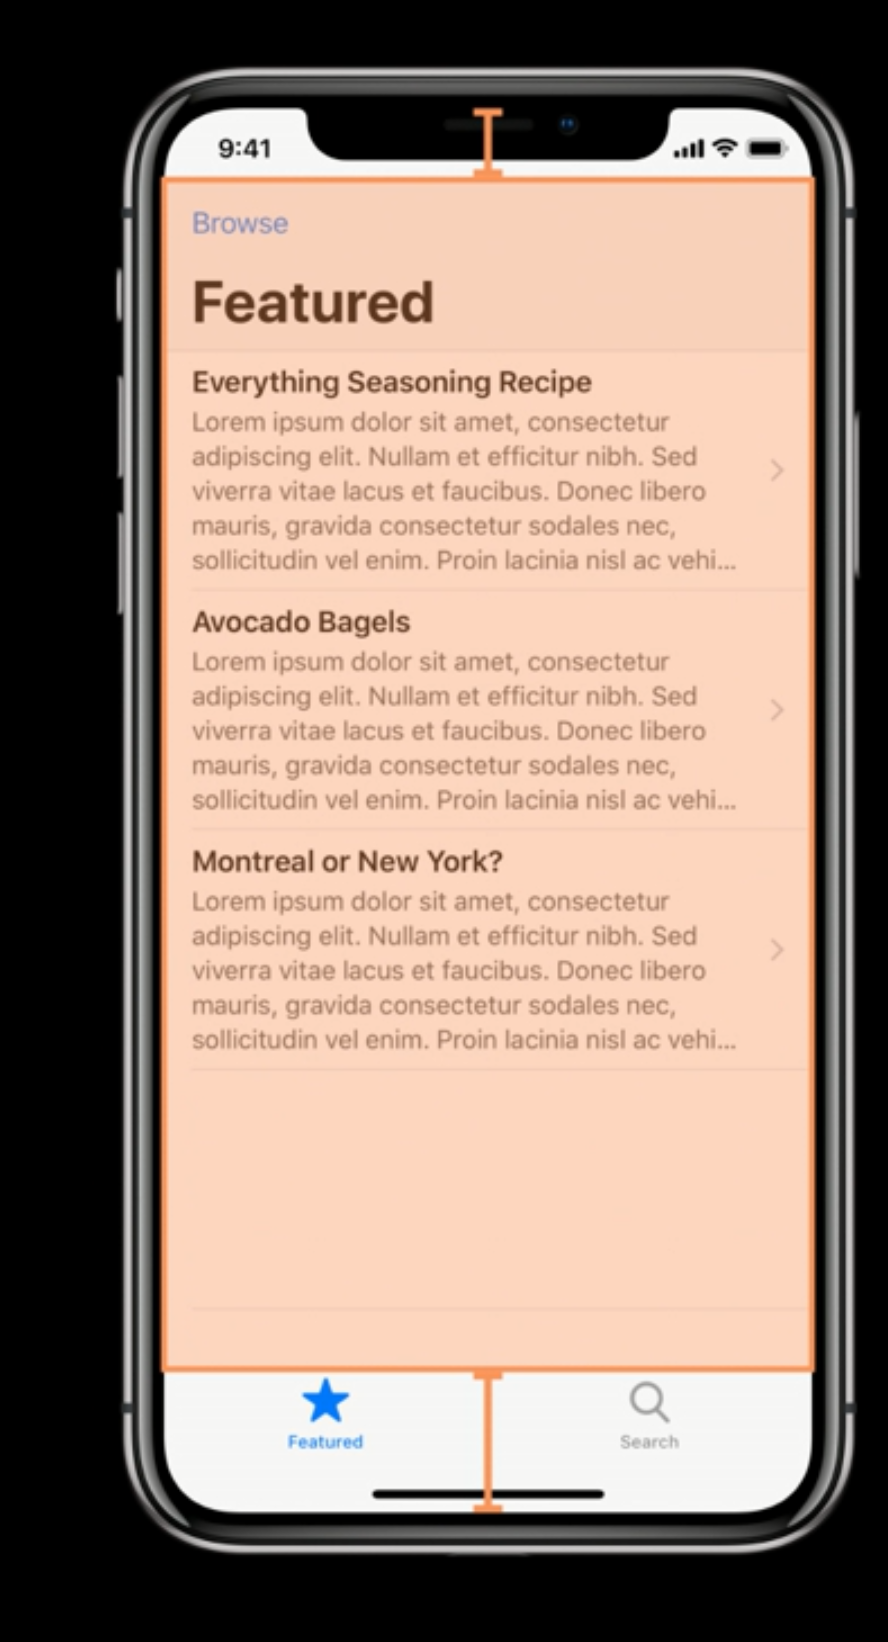
- The navigation controller is inside the tab bar, therefore it sees a smaller safe area that includes also the tab bar:
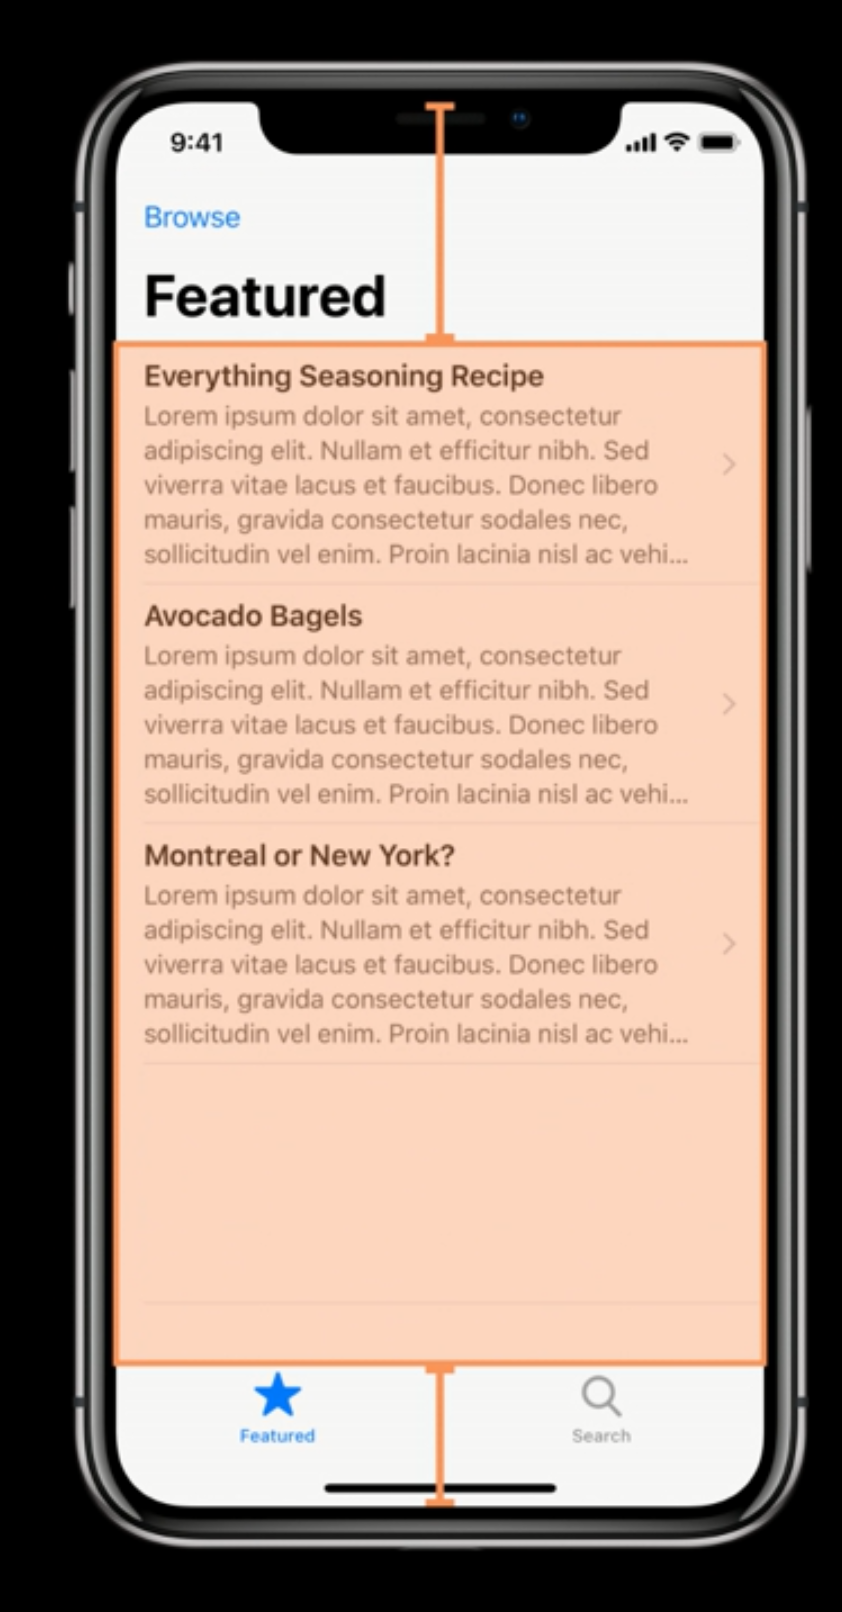
- Finally the content view controller has an even smaller area because of the navigation view:
The idea of safe areas is encapsulation: one view shouldn’t know, nor care if it’s running on a iPhone X or else.
If you want to hide the status bar: you shouldn't because it doesn’t work on iPhone X.
What you can do is remove both the status and navigation bars at the same time: this way the experience will be more immersive.
Rendering text on a wide environment
iOS provides a readable width that we are recommended to use all the time, this width is based on the user selected dynamic type (and probably other accessibility options in the future):
extension UIView {
  var readableContentGuide: UILayoutGuide { get }
}
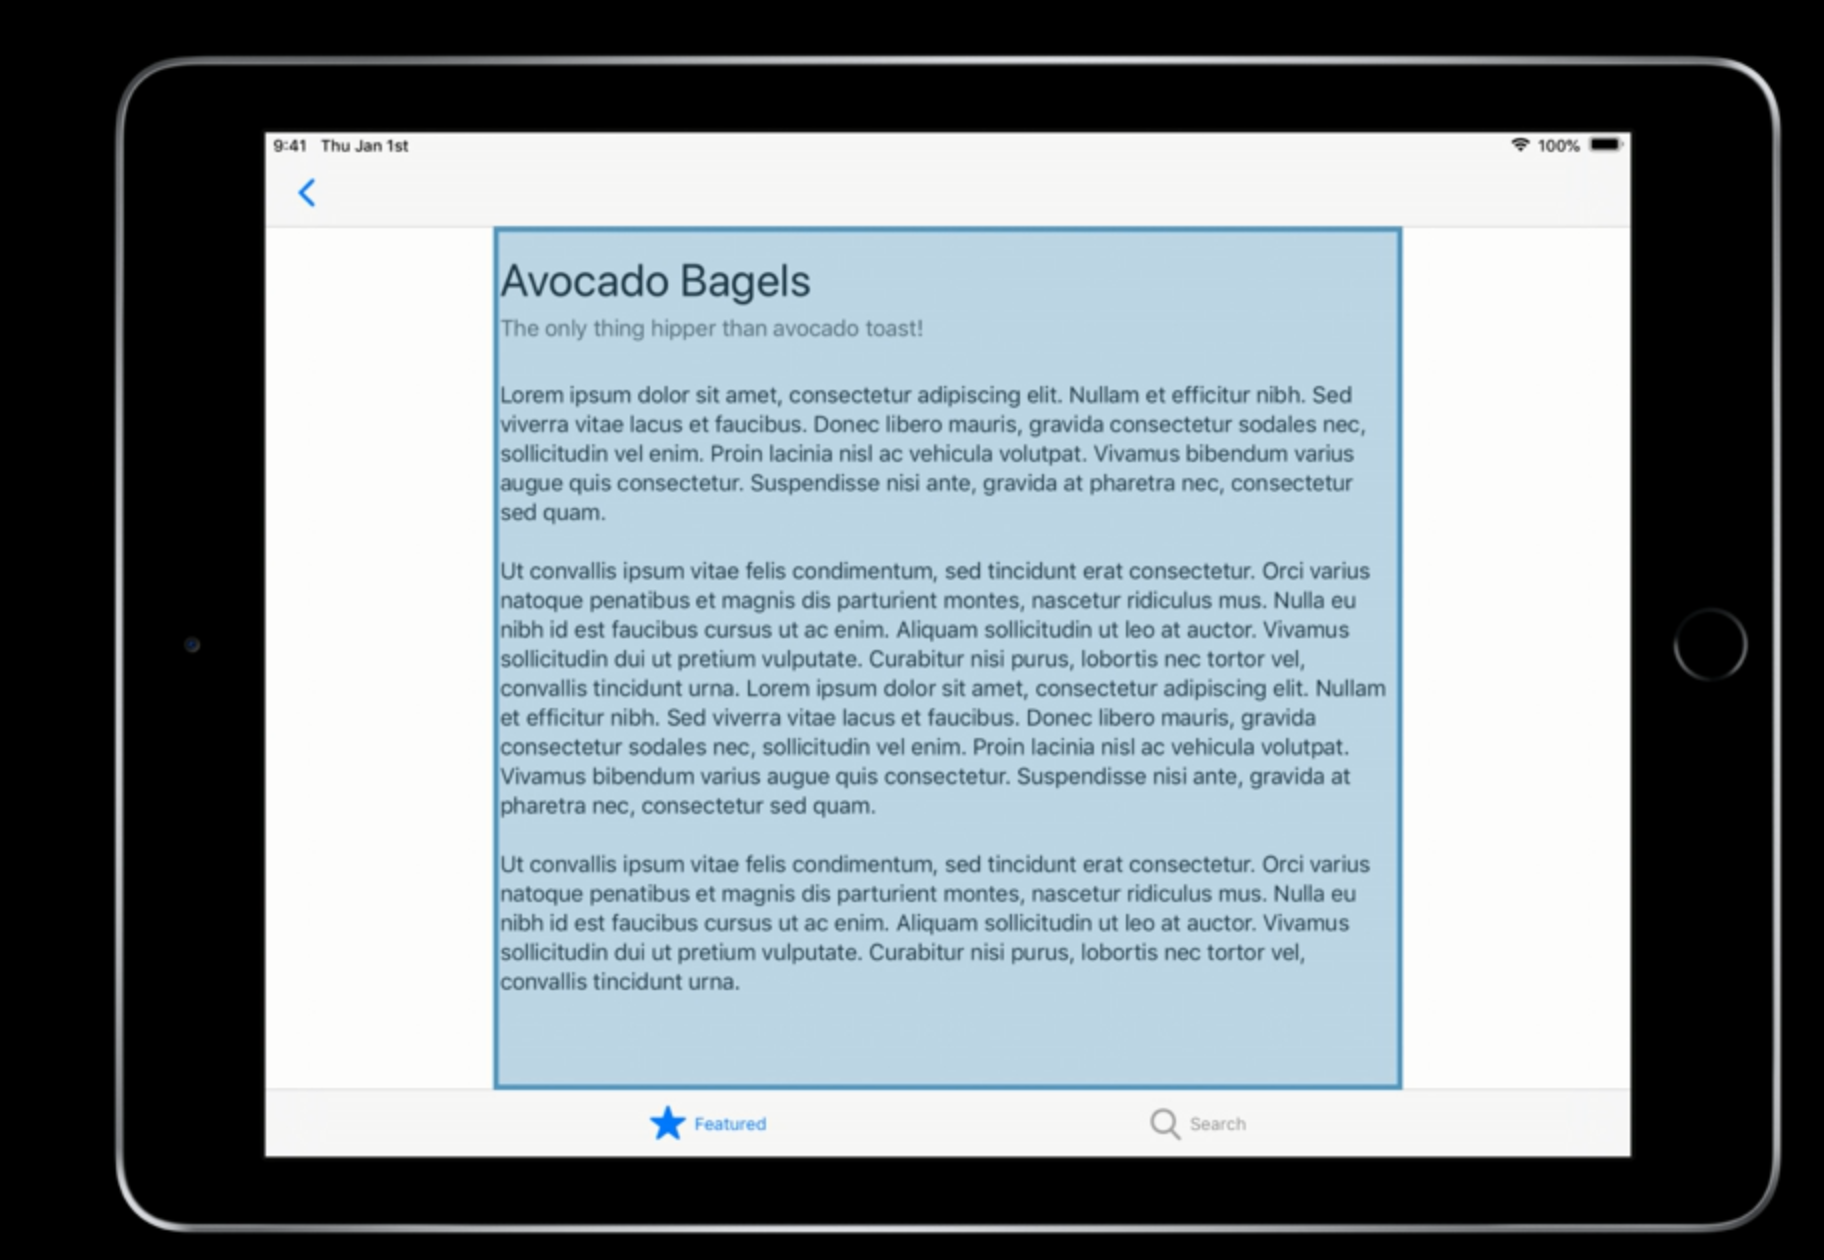 | 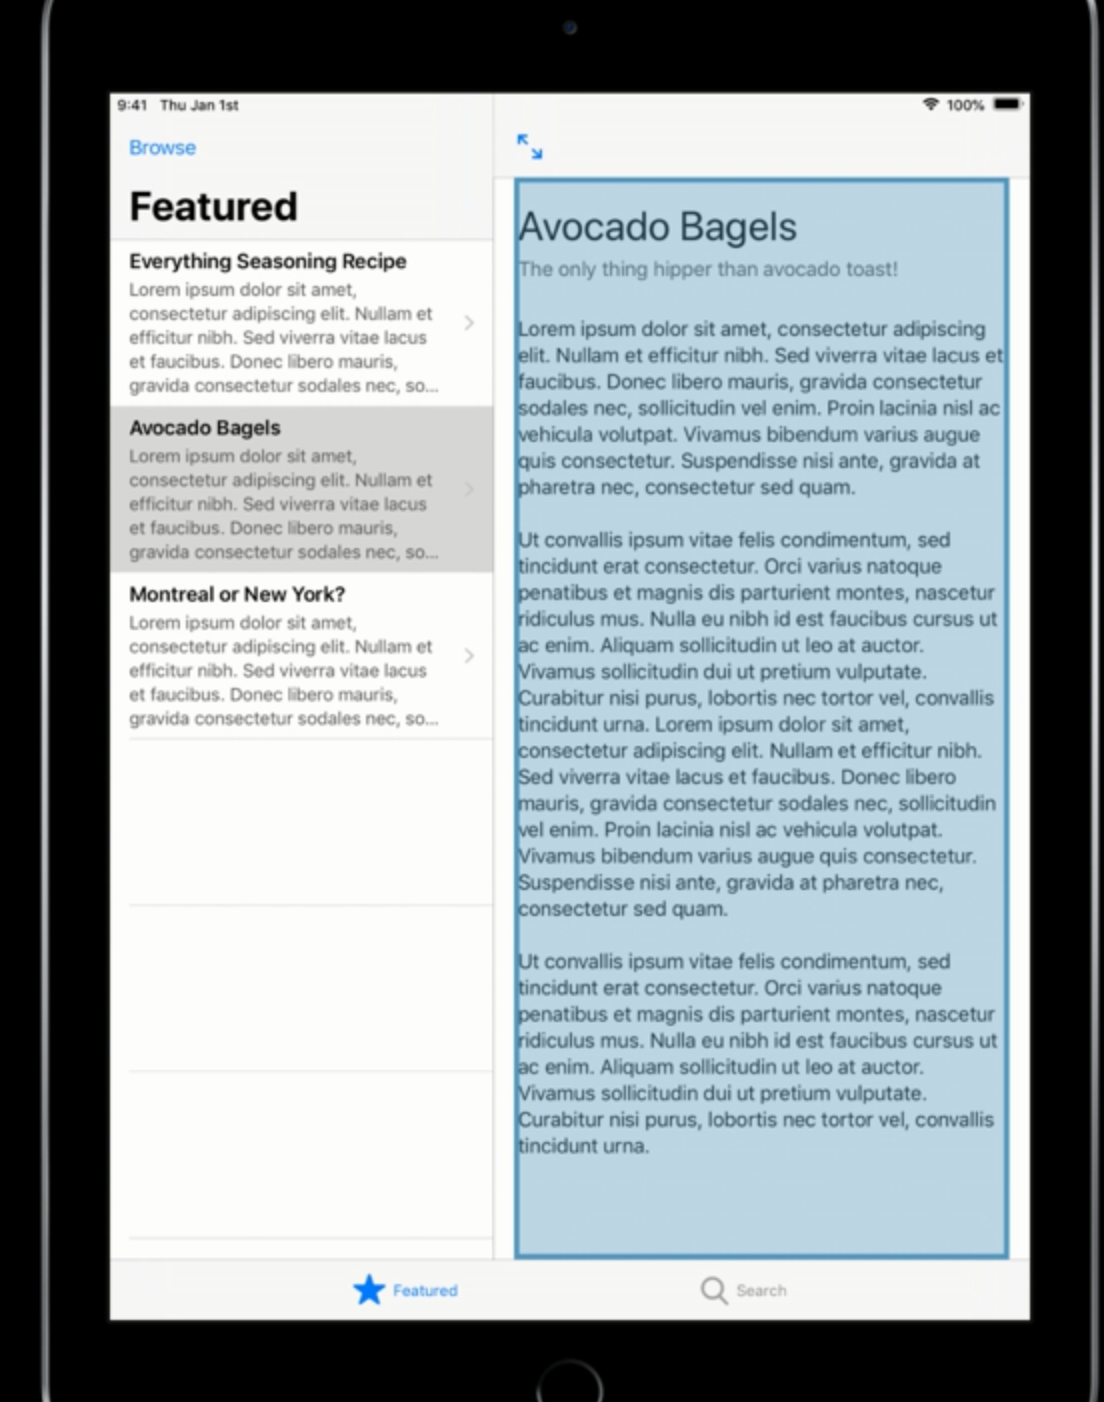 |
This guide works in also in narrow environments like the split screen above.
To adopt this in UITableView(s) there’s a property to set to true:
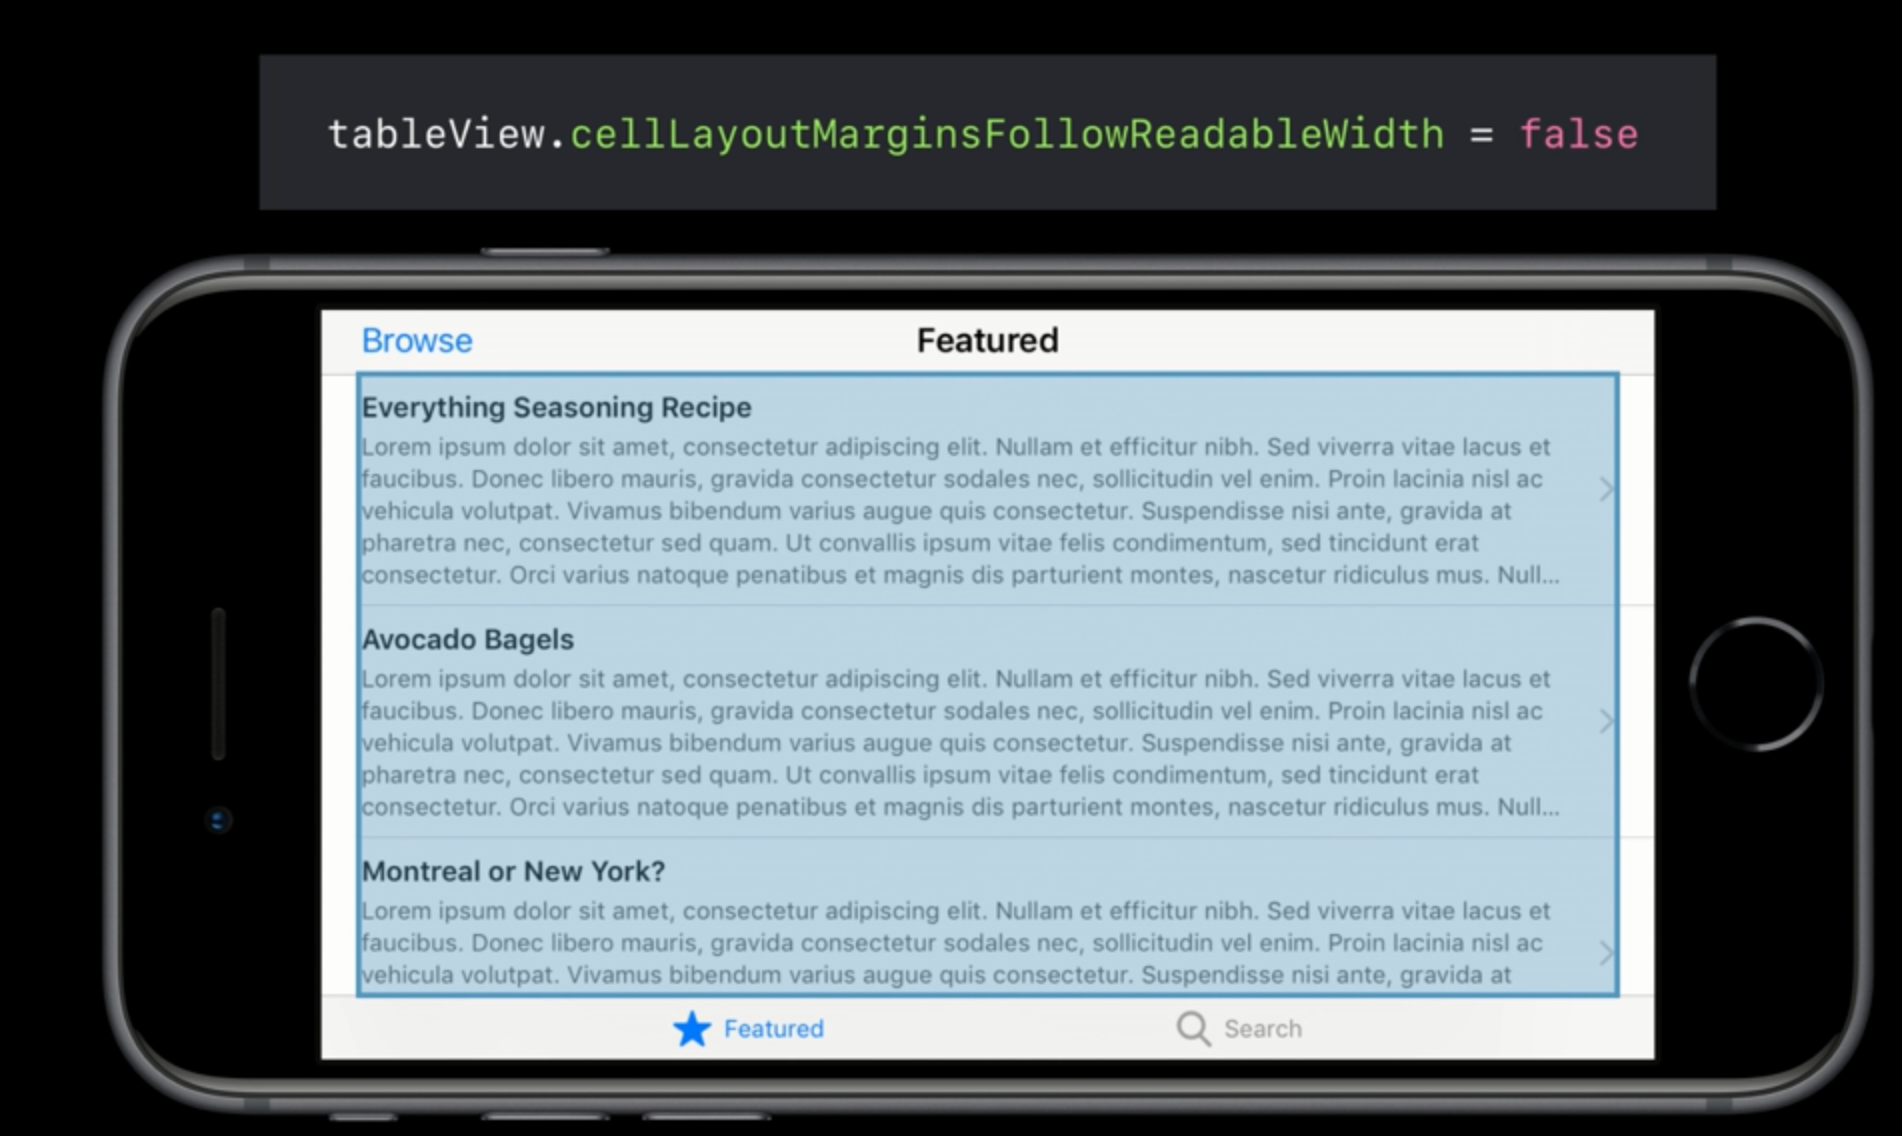 | 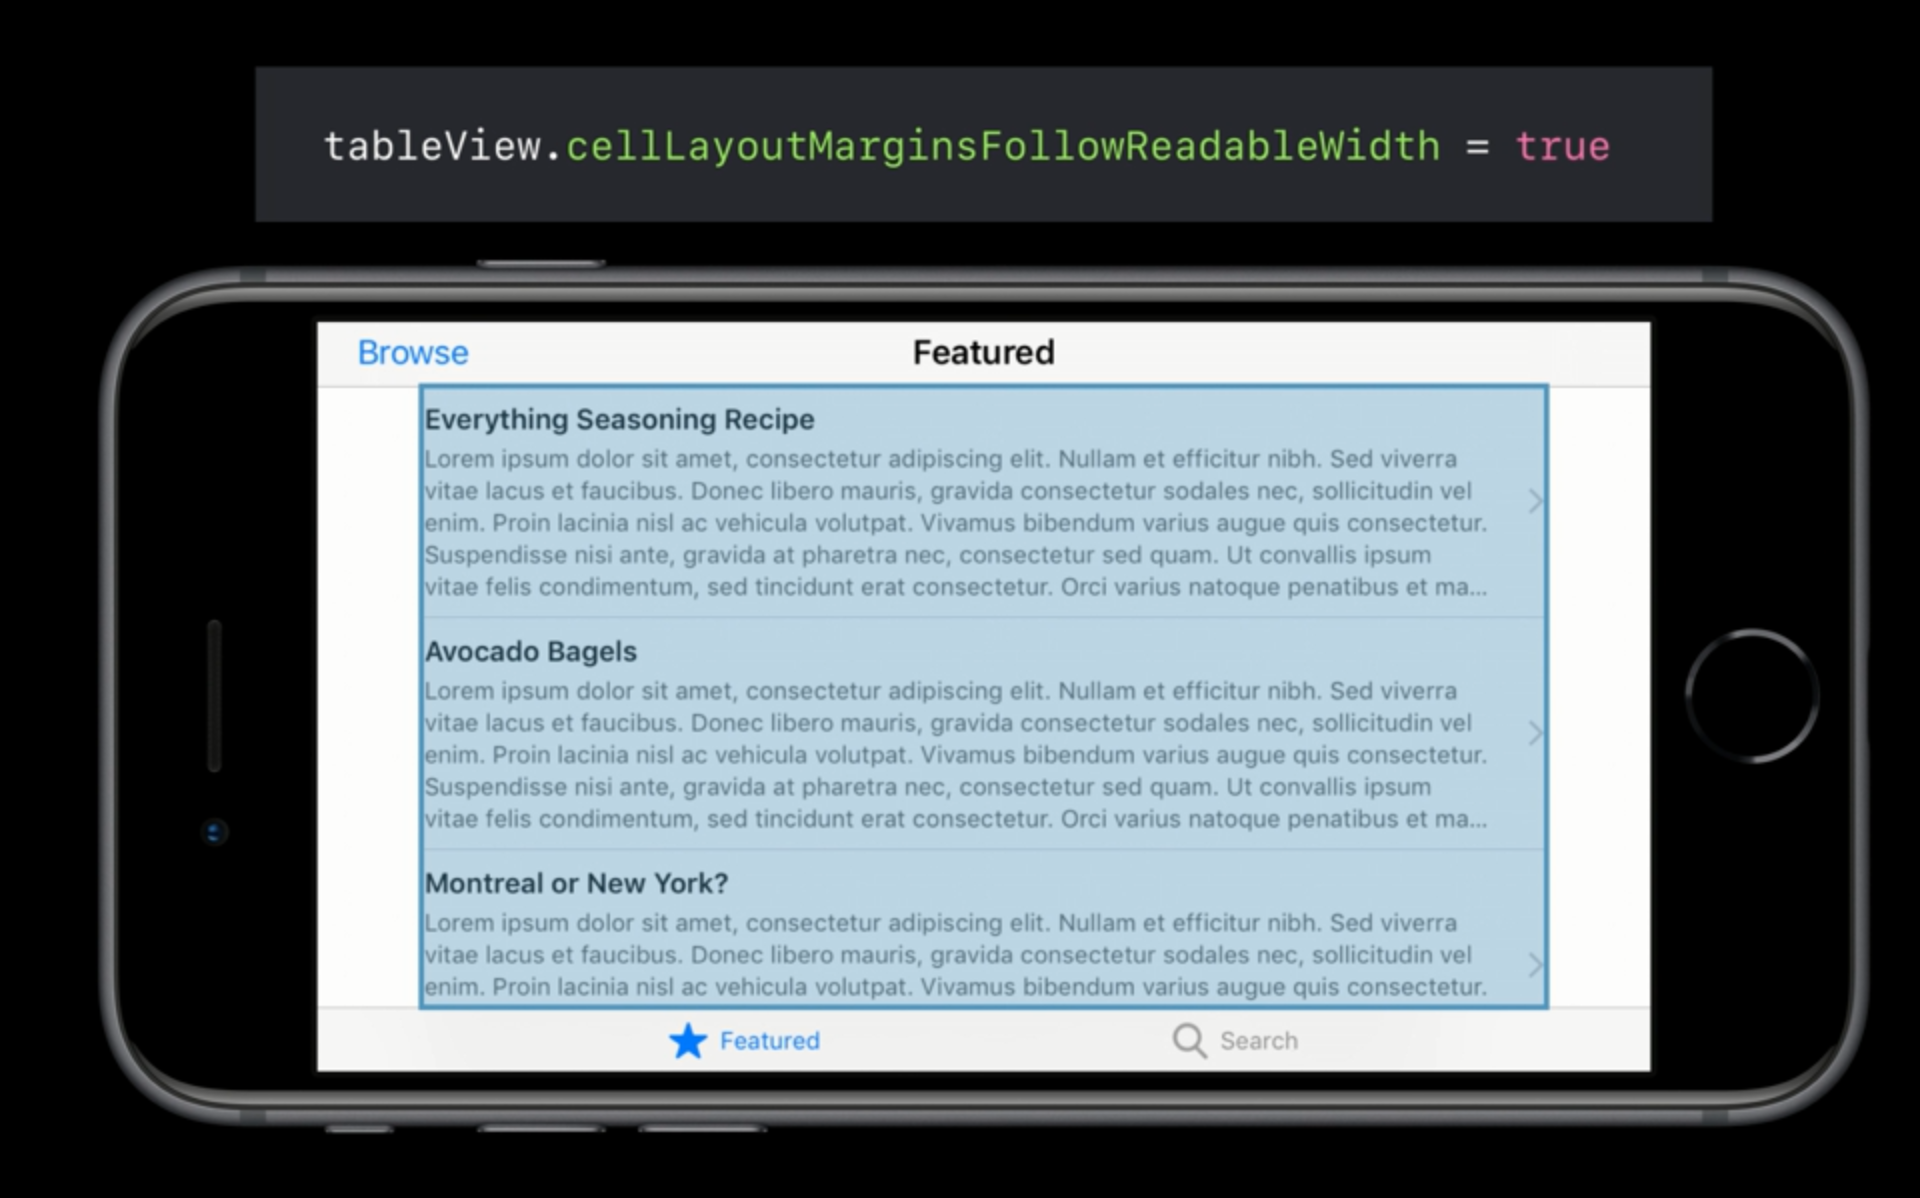 |
⚠️ the default value is false in iOS 12, but true in earlier iOS (iOS 11...) ⚠️
This parameter can be changed from the storyboard as well:
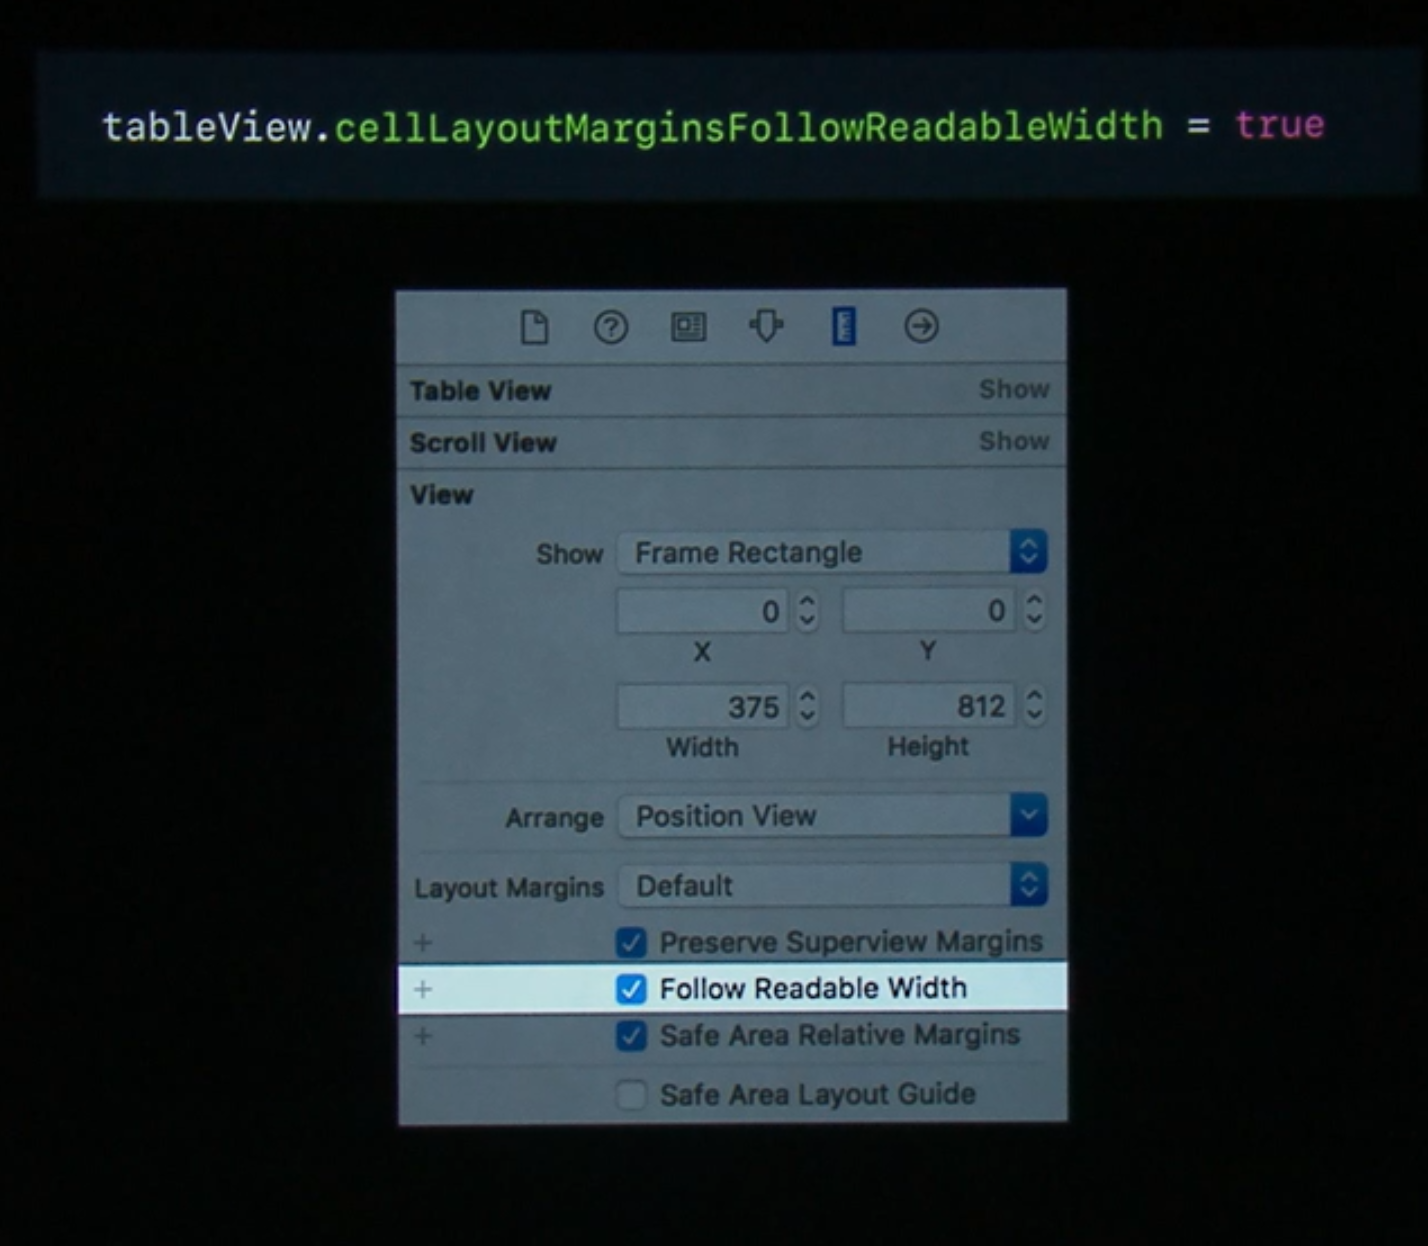
Apple suggests to leave the default value unless you know that you will display a lot of text in the table.
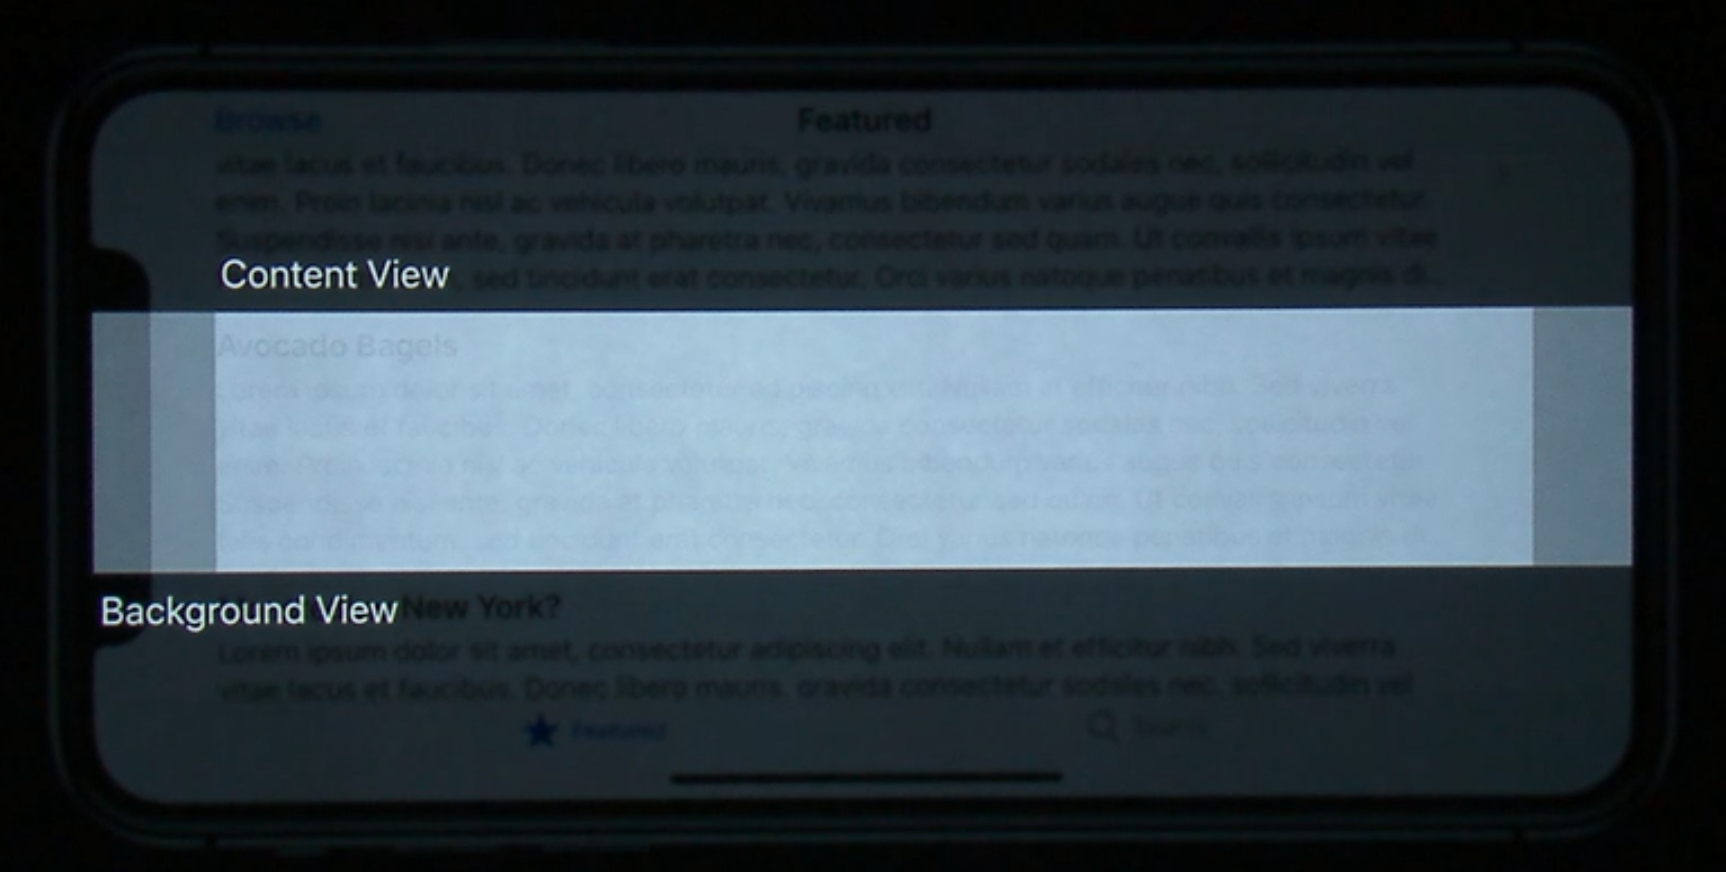
By default UITableViewCell .background and .selectedBackground will extend beyond the safe area, its content won’t:
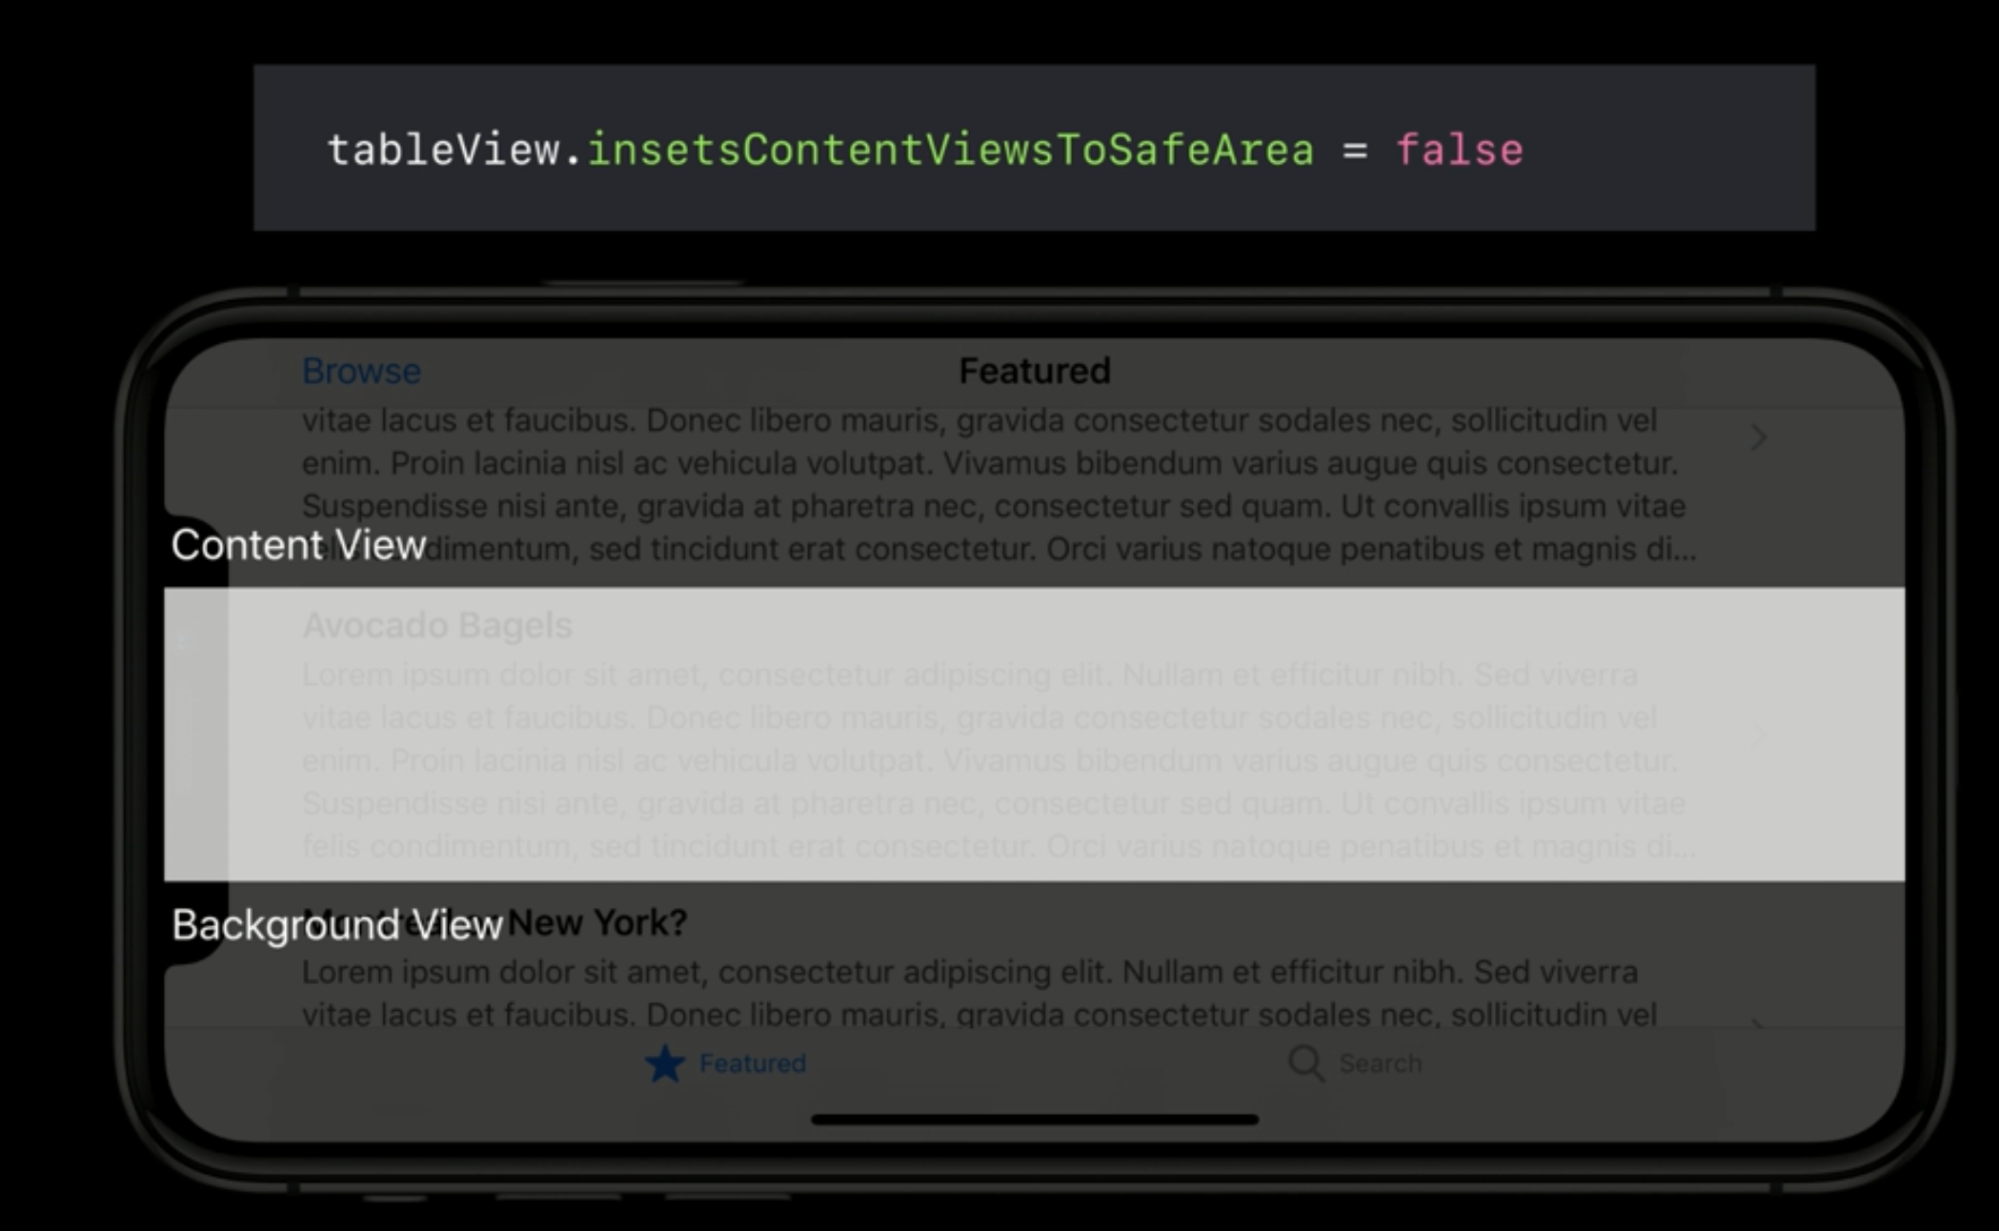
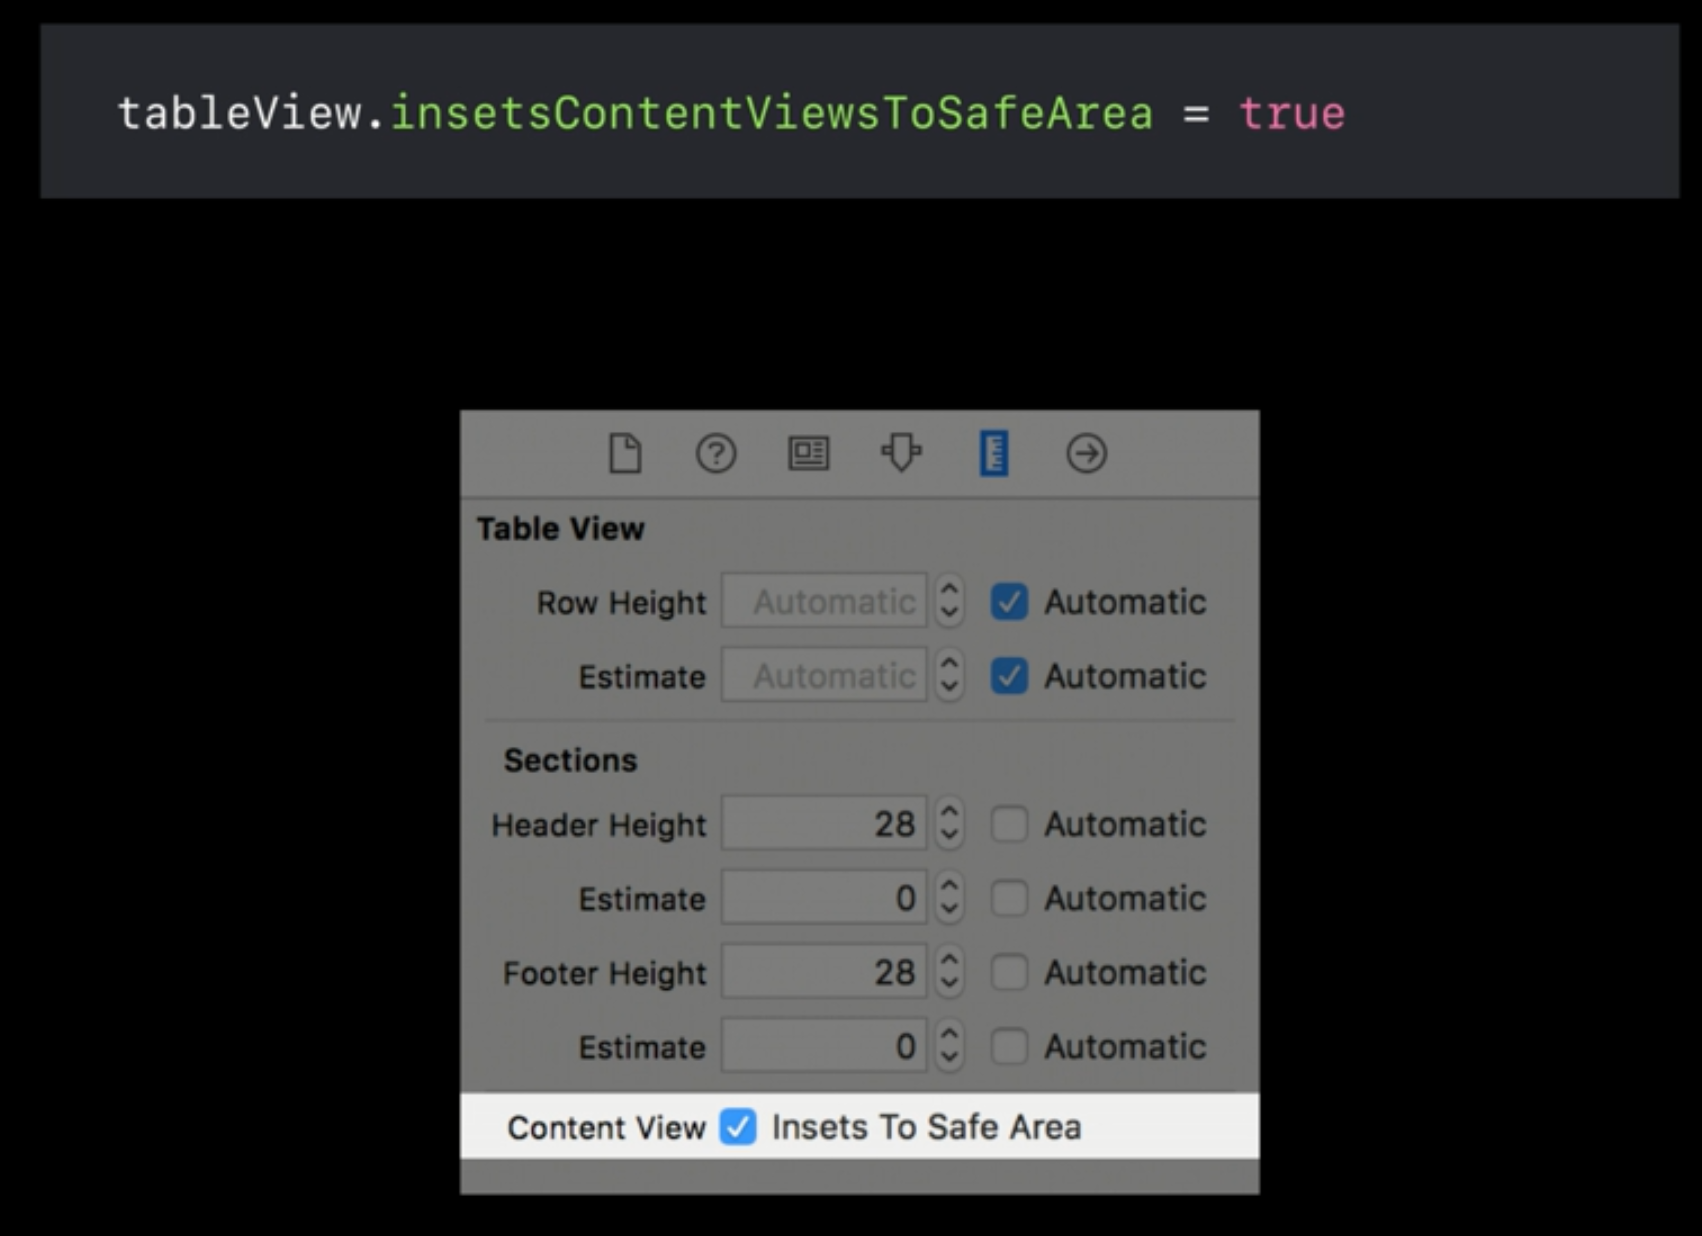
If you want the content to also extend beyond the safe area, here’s how:
 GitHub
 zntfdr.dev